I’ve never thought of myself as a particularly immobile person, but when it comes to my ankles I am so far from ideal range it’s ridiculous. This has, unfortunately, led to a string of injuries throughout my running life from chronic achilles tendonitis to mechanically induced stress fractures. Back in 2020 my left achilles flared up massively and it got to the point where my physio, Joe, who I’ve gone to for years, recommended shockwave therapy.
Shock wave therapy.
What is achilles tendonitis?
Whatever the cause (acute injury or built up over time) achilles tendonitis is inflammation/swelling of the achilles tendon – the stiff band of tissue that connects the calf to the ankle. This causes pain, stiffness and is sometimes characterised by a lump from the damage.
For me, the day-to-day symptoms included extreme stiffness when sitting/lying for long periods of time and a painful lump just above the insertion point at my heel. At its worst, I was in daily pain and struggling with running. The stiffness meant I was unable to put my heels down when I first got out of bed!
What is shockwave therapy?
Extracorporeal Shockwave therapy (ESWT) is a non-invasive treatment for musculoskeletal soft tissue, using shockwaves to deliver a mechanical force to the targeted tissue. This force stimulates tendon cell metabolism, initiating a repair process.
Tendons do not have a good blood supply and so only really get stimulation to repair when they are loaded. This is one of the things that makes tendonitis so often a chronic condition. It’s a delicate balance between enough and too much load. Shockwave therapy creates the stimulation to repair without the load.
How my treatment worked.
Joe recommended a course of four treatments, spaced out 1-2 weeks apart. It was best if I rested my achilles for 2-3 days after each course of treatment, so as not to aggravate them in an already vulnerable state. This meant, with running 3 days per week (all easy and no speedwork), I would go to have the treatment the afternoon after a run.
The treatment started off at a conservative intensity and number of shocks, increasing each time I visited. I wouldn’t say it was “painful”, as such, but it was uncomfortable. As the tendon itself is sore, what I can only describe as repeatedly flicking it was never going to be a walk in the park! But it’s also over really quickly.
Results of shockwave therapy.
Joe always said it would take about 12 weeks to see a result because this is the natural healing timeframe of any tendon. Funnily enough, almost bang on 12 weeks after finishing treatment I felt able to finally increase my running. I worked my way up to longer distance runs and added in some faster sessions. I even walked normally out of bed in the mornings!
In fact, this would forever be my guide! Having a benchmark like how your achilles feel in those first few steps makes it easier to manage niggles and injuries.
Almost a year on…
It’s now been just over a year since I started my shockwave treatment with Joe. I believe I made a full recovery after having the treatment, but I was always at risk of it returning as the underlying cause still existed. I haven’t dedicated as much time as I should have to increase my range of motion and, unfortunately, a trail run with shoes that had too low a heel drop for me meant a flare-up roughly halfway through the year.
I’ve kept things manageable over the racing season, but with the result achieved last time, I’m confident I can get back to where I was with a top-up treatment. Shockwave isn’t a miracle cure so we still need to find what works and doesn’t work for us in terms of prevention and management.
Have you ever had shockwave therapy or had it recommended to you? I’m a big believer in it and would love to hear what others think, too!
About Forge Physio
Forge Physio is an independent physiotherapy practice providing shockwave, and other physiotherapy treatments, out of the City of London and locally in Essex. They also work with recognised insurance companies to provide treatment through policy claims.
Sleep is not merely a break from training; it is a critical component of athletic life, akin to nutrition and exercise. It’s during deep sleep that the body undergoes repair and rejuvenation — a non-negotiable for peak performance. In today’s post on the Kafui Fitness Blog, we explore comprehensive strategies for enhancing sleep quality, ensuring athletes can leverage restorative rest as a secret weapon in their arsenal.
Exercise and Its Timing
Exercise is a double-edged sword regarding sleep. While regular physical activity is known to improve sleep quality, its timing is critical. Intense workouts elevate the body’s core temperature, heart rate, and adrenaline levels, which can be counterproductive if done too close to bedtime.
Additionally, exercising vigorously late in the evening can disrupt the body’s natural circadian rhythms, making it harder to fall asleep. Athletes should plan rigorous training sessions for earlier in the day and consider gentle, calming exercises like yoga or stretching in the evening to help the body wind down and prepare for restful sleep.
Establish a Pre-Sleep Routine
Creating a consistent pre-sleep routine is foundational to good sleep hygiene. This routine can include practices such as meditation, reading, or light stretching — activities that signal to your body it’s time to power down. Adding soothing elements like dim lighting or soft music can further enhance relaxation and prepare the mind for sleep.
It’s vital to reduce exposure to blue light from screens as they can disrupt the body’s melatonin production, crucial for regulating sleep. For athletes, incorporating muscle-relaxing techniques such as foam rolling or gentle massage can also address physical tension, paving the way for deeper rest and recovery.
The Ideal Sleep Environment
Building on the pre-sleep routine, the physical sleep environment must promote relaxation. The ideal bedroom should function as a sleep sanctuary: cool, dark, and quiet. A drop in temperature aligns with the body’s natural sleep onset process, and darkness helps sustain melatonin levels.
Investing in a comfortable, supportive mattress and pillows tailored to one’s sleep preferences can significantly enhance sleep comfort. Tools like blackout curtains, eye masks, and earplugs can be essential for athletes living in bustling environments, helping to block out external stimuli that may disrupt sleep. Such small modifications, along with a peaceful and ergonomic sleeping arrangement, can lead to significant improvements in sleep quality.
Dietary Considerations
Nutrition plays an unsuspecting role in sleep. Athletes should consider their evening meals carefully — opting for lighter, easy-to-digest foods that support sleep. Foods rich in magnesium, potassium, and tryptophan can help relax the nervous system and muscle tissue.
Incorporating herbal teas, such as chamomile or lavender, into the nighttime routine can also promote relaxation and aid in sleep readiness. Balancing fluid intake is crucial to minimize night-time awakenings, and avoiding stimulants like caffeine or high-sugar snacks in the evening is equally important. Synchronizing meal timing to allow 2-3 hours before lying down can make a substantial difference in the quality of rest and the ease of falling asleep.
Integrating Mindfulness and Meditation
Mindfulness and meditation can quiet an athlete’s often active mind, offering a pathway to tranquility and mental focus. Techniques such as guided visualization or deep-breathing exercises foster a state of relaxation necessary for deep sleep. Incorporating these practices into daily routines, whether in the morning to set a calm tone for the day or at night to prepare for sleep, can greatly benefit an athlete’s overall well-being.
These practices can be especially beneficial for athletes, aiding in the reduction of pre-competition anxiety, improving concentration, and enhancing overall mental resilience. In addition to facilitating a more profound rest that’s essential for recovery, mindfulness and meditation also help in managing stress and emotional highs and lows, contributing to a more balanced state of mind.
Natural Sleep Aids and Supplementation
When additional support is needed for better sleep, natural remedies can play a significant role. Valerian root, renowned for its sedative properties, has a long history of use as a sleep aid. It can be effectively incorporated into an athlete’s sleep strategy, but it’s crucial to seek professional consultation before use to ensure it aligns with their health and training requirements.
Another beneficial herb is jujube, which has been traditionally used in Eastern medicine to promote calmness and improve sleep quality due to its soothing properties. CBD and THCA, both non-psychoactive compounds derived from available hemp offerings of the cannabis plant, have gained attention for their potential to aid in relaxation and sleep without the mind-altering effects associated with THC. Athletes considering these natural remedies should do so under professional guidance to ensure they complement their diet and training regimen and do not conflict with any regulations or drug testing protocols in their sport.
Leveraging Technology for Better Sleep
While technology is often viewed as a disruptor of sleep, it can also serve as an ally in enhancing sleep quality. Sleep-tracking devices and smart wearables can offer invaluable insights into sleep patterns, helping to pinpoint what works and what doesn’t for an individual’s sleep hygiene. These devices can also monitor aspects like heart rate variability and body temperature, providing a more comprehensive understanding of one’s sleep health.
Features such as sleep-phase alarms can wake an athlete at the optimal time in their sleep cycle, making mornings feel less groggy and more refreshing. Additionally, apps that provide ambient sounds or guided meditation can aid in creating a relaxing environment conducive to falling asleep faster. This integration of technology into sleep routines allows athletes to make data-driven decisions for improving their sleep and, consequently, their performance.
Final Thoughts on Deep Sleep for Athletes
Restorative sleep is undeniably a cornerstone of athletic success, and it should be prioritized as a vital component of an athlete’s training regimen. By cultivating a conducive sleep environment, engaging in appropriate pre-sleep activities, considering diet and exercise timing, embracing mindfulness practices, and possibly integrating select supplements or technology, athletes can harness the full potential of their rest periods for recovery and enhanced performance.
It’s worth emphasizing that individualized approaches to sleep optimization are crucial, as what works for one athlete may not be suitable for another. As sleep science continues to evolve and new wellness products and strategies emerge, staying informed and open to innovation will remain an essential part of the athlete’s journey to peak performance.
As I was clearing the heavy and wet snow from my driveway a couple of days ago it wasn’t long before I noticed that my breathing, while not labored, was heavier than when at rest. This was because of the very nature of the 8 to 10 inches of snow that we had received, I was actually having to push my snow blower while traversing from the bottom of my drive up to the top. This got me to thinking about the poor souls who have no choice but to use a shovel for snow clearing. If the snow blower was requiring effort from my physically fit body, I know that it was going to be quite a taxing activity for those who only have a shovel to use. Add obesity and a sedentary life on top of that, and you have a tragedy in the making.
American Heart Association urges caution!
The American Heart Association, the world’s leading nonprofit organization focused on heart and brain health for all, urges caution when picking up that shovel or even starting the snowblower. Research shows that many people may face an increased risk of a heart attack or sudden cardiac arrest after shoveling heavy snow. Snow shoveling along with other physical activities can place extra stress on the heart, especially among people who aren’t used to regular exercise.
Better health should trump appearance with weight-loss!
People often think that weight-loss is all about changing one’s appearance, while not considering the health implications which come from being overweight and out of shape. If this is your mindset, you should seriously consider changing it. When losing weight and increasing your level of physical fitness with regular exercise, your focus should be on increasing the quality of your life. Looking better is only the icing on the cake.
Photo by Serkan Gönültaş at Pexels
Cold, winter weather in general can contribute to an increased risk of heart attack. Cold temperatures can increase your blood pressure while simultaneously constricting your coronary arteries. Those two factors, combined with the higher heart rate from physical exertion, is known to increase the risk for acute cardiac events. There are even studies that show an increased risk for heart attacks among people using automatic snow blowers!
According to Harvard Health, about 100 people — mostly men — die during or just after shoveling snow each year in the US. Many more are admitted to the hospital with chest pains or other heart problems. Just think, being in your best physical condition can greatly alleviate your risks from falling over dead as a result of clearing snow from your sidewalks and driveways. Most heart attacks are actually preventable just by keeping your body in optimal condition.
Then consider this too, a sedentary lifestyle combined with the unhealthy food choices that most obese people consume is part of the price you pay for an early funeral.
The correlation between snow shoveling and heart attack is obvious for several reasons.
Shoveling snow (or perhaps other means of snow removal, including pushing a heavy snow blower) can raise your heart rate and blood pressure more quickly and more dramatically than many other types of exercise.
Snow shoveling requires use of arm muscles, which for most people is more strenuous than other exercise.
Snow removal happens in a cold environment. That’s important because cold temperatures may cause blood vessels to constrict.
Many snow shovelers are ordinarily sedentary. The sudden, strenuous workout may tax a system that is not prepared for it.
Image from Freepik
How healthy is your cardiovascular condition?
We know that exercise keeps our bodies in good cardiovascular condition. However, if you’re not accustomed to a difficult routine and you try to do too much to soon, it may disrupt the way your heart pumps blood and oxygen through your system.
When many people shovel snow, they may get into a hurry to just get it over with. Sudden exertion, like moving hundreds of pounds of snow after being sedentary for several months, can put a big strain on the heart. Unfortunately, tragedy strikes too many families every winter as a result of clearing snow.
Cardiovascular disease affects more than 27 million people in the US and takes more than 600,000 lives each year. An obese person requires a heart that is able to pump greater amounts of blood, so the chamber size—the actual cavity of the heart—enlarges, and the muscle gets thicker as well. Over time in some individuals, the heart cannot compensate, and after a while, it begins to lose some of its ability to relax or its ability to pump blood to the rest of the body. Both can lead to heart failure. (1)
When we become obese, all of that excess weight can put you at risk for coronary artery disease and an eventual heart attack. Losing weight should be the obvious solution, however, this does not mean that you should attempt to lose weight too quickly as that can also exacerbate the problem. You didn’t gain your excess weight overnight, therefore don’t think that you should lose it overnight. Healthy weight-loss is no more than 1 to 2 pounds per week. Any quicker than this, you need to be under the supervision of your physician.
I didn’t anticipate getting much out of Breath. I (foolishly) thought I knew what I needed to know on the topic. Listening to Nester on the 10% Happier podcast intrigued me enough to invest in the book. I figured it would be a strong review, and reviews are vital…we all forget stuff along the way. I was pleasantly surprised; the book not only reminded me of the basics of breathing, but it also taught me a few key new things, such as how important nose breathing is. My biggest takeaway was “shut your mouth; breathe through your nose.” 🙂
The problem with trying to entice people to read a book on breathing is that we are already breathing. If we weren’t, we wouldn’t be alive. The topic seems somewhat “been there, doing that.”
To delve into the book, one must first buy into Nester’s thesis that, yes, we are all breathing, but most of us are not breathing CORRECTLY. Ninety percent of us are breathing in a way that doesn’t serve us, which is problematic because no matter what you eat or how much you exercise, you cannot optimize your health if you are not breathing properly. The missing pillar of health is breath.
Everything starts with how and how often we breathe; the quality of our breath impacts everything from our athletic performance to our quality of sleep. Making even slight adjustments to the way we breathe can jump-start athletic performance; rejuvenate internal organs; halt snoring, allergies, asthma, and some autoimmune disease; and even straighten spines.
We take roughly 25,000 breaths a day, which can be helpful. Those 25,000 breaths offer almost endless opportunities to create positive change!
Now, most of us don’t spend much time thinking about those 25,000 breaths. This is, for the most part, a good thing. Breathing should be automatic; automaticity allows us to breathe without having to divert attention away from day-to-day activities. Automaticity only becomes a negative when you have developed suboptimal breathing strategies; then you are simply automatically breathing with subpar form. (Obviously breathing sub-optimally is better than not breathing at all, but breathing optimally should be our goal.)
Before Nester wrote this book, he was one of the 90%. Nester admits he put no intentional thought into his breath pattern. That changed through researching the book. Nester actively participated. First, he used an apparatus that only allowed for mouth breathing. Then he switched and used a tool that ensured he only used his nose to breathe. The results were that breathing through his mouth increased his snoring, blood pressure, and sleep apnea and decreased his performance. Whereas, breathing though his nose on the other hand decreased his snoring, blood pressure, and sleep apnea and increased his performance.
If you are part of the 90% of us who have never thought about the breath, now is the time to start. With awareness brings choice; once you know how you are breathing you can adjust your technique. Below are a few of the main takeaways from Nester’s book. If you are interested in “actionable steps” vs “exposition,” skip “Breathing 101” and go directly to “Let’s get physical.”
Breathing 101
Inhaling brings oxygen into the body, fuels movement, and feeds our brains; inhaling amps us up. When in danger, we breathe faster. Think “fight or flight” or “mobilization” mode.
Exhaling engages our parasympathetic system; it calms us down. Think “rest and digest” or “campfire” mode.
Too many of us are “chest breathers”; we take shallow, rapid inhales. Many of the experts Nestor consulted believe that frequent, almost manic inhales are a symptom of a constant state of stress. In our anxiety and distraction, with bad posture and laptops propped on kitchen tables, we gasp for air as if we were drowning. This pattern of “gasping” — of chest breathing — can lead to chronically tight chest and neck muscles, a flared rib cage, and a generalized sense of anxiety.
Your breathing style should ideally match your goal of that moment. For example, if you are doing the modern equivalent of running from a tiger, feel free to focus on the inhale. Inhaling charges up our nervous system. Exhaling on the other hand, calms us down. When you are trying to calm your anxiety or fall asleep, take longer exhales. The calmer you want to be, the longer your exhale should be.
According to Nester, the key is to create a baseline way of breathing that revolves around breathing through the nose and getting a full exhale. Mouth breathing spikes stress hormones, increases blood pressure, increases rates of sleep apnea and snoring, and negatively impacts heart rate variability. The mouth should only be a “backup” ventilation system for when the nose is plugged, or you need some extra oxygen at the end of a race or intense workout. Extending the exhale will move the diaphragm up and down, which will get air out so you can get air in.
An ideal breath rate is roughly 5.5 breathes per minute: take 5.5 seconds to breathe in and 5.5. seconds to breathe out. This pattern allows blood flow to the brain to increase, and for the heart and the nervous system to coordinate. Of course, if this is too intense, start with breathing in for 3 seconds and out for 3 seconds. ALWAYS start where you are!!
Let’s get physical! Time to create some embodied knowledge!
1. Find your nose
Your nose is your HVAC system; it cleans air, heats air, moistens air for easy absorption. Breathing through your nose triggers a cavalcade of hormones and chemicals that lower blood pressure and ease digestion.
Get comfortable breathing through both nostrils; each offers slightly different benefits. Think of the right nostril like a gas pedal ― it stimulates the sympathetic nervous system which increases circulation, body temperature, blood pressure, and heart rate. It feeds blood to the left side of the brain, our logical centre. Think of the left nostril as our “break.” The left nostril is more connected to the parasympathetic side of our nervous system. The left nostril cools the body, lowers blood pressure and heart rate, and decreases circulation. It feeds blood to the right side of the brain.
TRY IT!
Alternative nostril breathing
Sit tall; don’t slouch. Put your right thumb on your right nostril. Hold down and inhale through your left nostril. Then place one of your right fingers on your left nostril and hold. Pause. Hold your breath. Next lift your right thumb and exhale through right nostril. Finally hold your right nostril with your right thumb and hold your breath. Repeat.
Box breathing
Sit tall; don’t slouch. Take 4 seconds to inhale. Hold your breath for 4 seconds. Take 4 seconds to exhale. Hold your breath for 4 seconds.
2. Find your diaphragm
Think of your diaphragm as your thoracic pump or your “second heart.” As we inhale the diaphragm descends, which creates a negative pressure in the thoracic cavity and draws blood into the heart. As we exhale the positive pressure of the diaphragm ascending allows the blood to shoot out to the body. The diaphragm is like an umbrella that expands and contracts. Most of us only use small range of diaphragm movement which puts burden on heart.
TRY IT!
Start on your back, right hand on the side of your waist so that your fingers reach slightly under your lower back, and your left hand on your upper chest and neck. Breathe in. Feel the diaphragm descend. Your inhale should create pressure into your right hand and into your back. The left hand on your chest should not move. Exhale. The pressure on your hand right hand should lessen as your diaphragm ascends.
Now practice this 3-dimensional diaphragmatic breathing on all fours, standing, sitting, and walking. Inhale into your back ribs, obliques, and pelvis. Your chest should rise last, or not at all. Exhale with control as the pressure leaves your ribs, obliques, and pelvis.
Use a TheraBand for extra tactile feedback. Sit on a hard chair. Hook a long TheraBand around your mid back, where a bra band would sit. Hold the ends of the band with your hands. As you inhale feel the band expand behind and your diaphragm descend downwards; feel weight in your pelvic floor and sit bones. As you exhale your ribs should become less connected to the band.
Test yourself. Stand in front of the mirror. Breathe in and see what happens. Your torso should expand slightly. Your chest and neck should stay relaxed. If, as you breathe in, all the muscles pop out of your neck and your chest rises before your torso expands, you are probably chest breathing and/or breathing too aggressively. What happens as you exhale? Can you notice yourself exhaling?
3. Find your exhale
Train your body to take a FULL exhale vs a partial exhale. Think of this skill as a muscle, you must consciously strengthen it to get stronger. To strengthen it consciously extend your exhale.
TRY IT!
Inhale for 3 seconds. Then exhale for 6 seconds.
Final thoughts
You take your breath with you so you can LITERALLY work on your breathing at any time. Practice box breathing while waiting for elevator or purposely take a long exhale to calm yourself down when talking to a frustrating human.
Remember, there is no ONE perfect way to breathe. Everything in life depends on context and intention. Know how you habitually breathe ― your normal ― and why and when you breathe in particular ways. Then match your breathing to your goal. Inhale to amp you up. Exhale to calm you down.
Become the “pilot” of your body vs simply the passenger.
It is easy to understand intellectually that how we breathe is important; it is another to learn to breathe differently. Knowing and doing are two different things. To change your habitual automatic way of breathing requires repetition; repetition is the mother of all skill. Set an alarm or establish a colour cue to ensure you get your “reps in.” When the alarm goes off do 5 purposeful breaths. When you see your chosen colour do 5 purposeful breaths.
Be compassionate with yourself as you work through the process. You have taken literally millions of breaths throughout your life ― changing the pattern will take time.
As a new dad, space has quickly become a premium in my NYC apartment home.
In my quest to find a compact yet effective solution for my home gym, I came across the Vitruvian Trainer+.
Is this smart, functional trainer good enough to help me downsize my cluttered home gym?
I am pleased to say that this machine has exceeded my expectations – and I have been lifting for over 15 years.
Keep reading to learn more.
This post may contain affiliate links: meaning we may receive a commission if you use them.
Key Takeaways
– The Vitruvian V-Form Trainer+ is a minimalist yet versatile home gym solution, ideal for those who want a complete gym workout but have limited space.
– You can do over 100 exercises, including variations of the big 4 (squat, deadlift, overhead press, bench press), with up to 440 lbs of resistance.
– The smart technology enables quick and easy transitions between exercises and weight adjustments, saving time and making your workouts more efficient.
– It can replace most but not all of your home fitness equipment.
Is The Vitruvian Trainer+ Worth It? (TLDR Quick Summary)
As someone who has been lifting weights for over 15 years, I can say that the Vitruvian Trainer is hands-down 100% worth it. Brittany and I LOVE working out on the machine.
Every time I see it, I want to turn it back on and keep using it, even after I have finished my workout.
It’s literally that much fun to use.
Most importantly, the Vitruvian has single-handedly replaced 90% of my home gym equipment.
And this is coming from former powerlifters who do functional strength training.
My biggest doubt about the machine was whether I could truly do big compound lifts on it like squats, good mornings, and Romanian deadlifts and if it would feel natural.
Believe it or not, many of these compound exercises feel BETTER and smoother than their barbell counterparts.
Since getting the Vitruvian, I have not touched my rack, barbell, weight plates, or adjustable dumbbells in over a month.
Plus, my workouts are so much more efficient as it only takes seconds to swap the accessories, and change the weight.
All without making noise!
Gone are the days of loading and unloading weight plates, rearranging the rack and barbell at 5AM fearing that we will wake our sleeping son or the neighbors.
Obviously, not everything is perfect, and there are some cons.
Keep reading to learn more.
Late 2024 Update: I’ve been using the machine now for over 1.5 years. It continues to be my main piece of equipment for resistance training. I also don’t use the membership and it is still 100% functional for my needs.Lastly, they just released an “Echo” mode which is fantastic. It is a lifting mode that RAPIDLY adapts to how much force you are lifting with and adjusts with every rep. It’s like an automatic supply of drop sets built in to the machine.
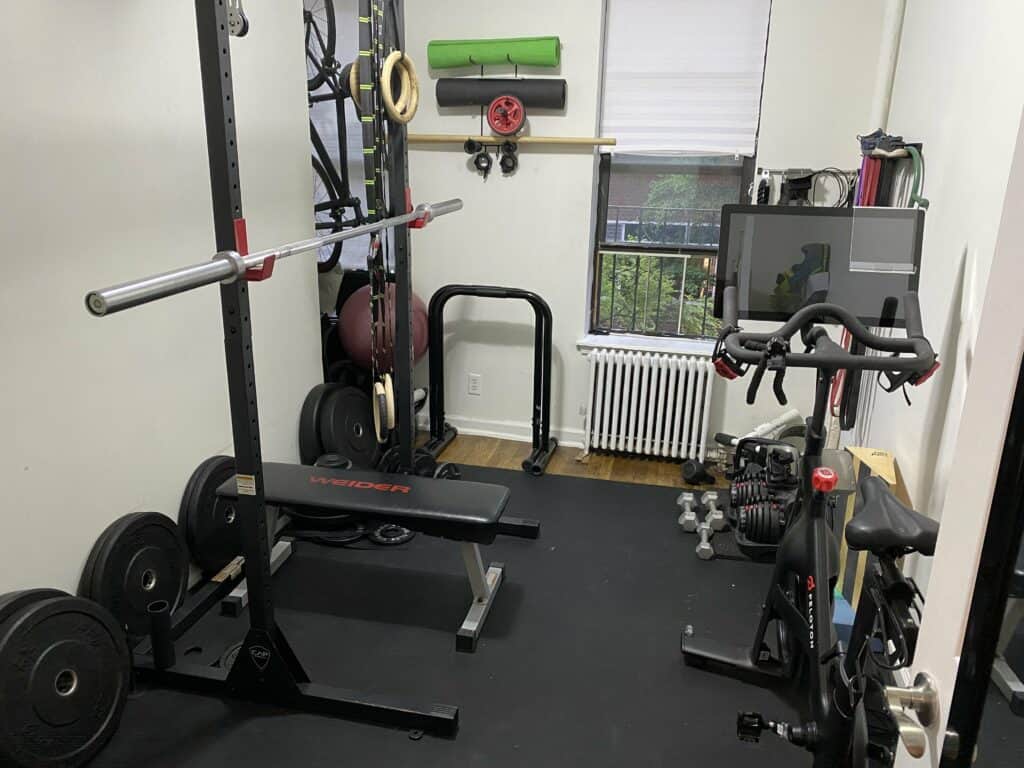
My Previous Home Gym Set-Up
Now that my son is 12+ months and walking, space has become a precious commodity in my home.
We live in a two-bedroom apartment, and get this; our primary bedroom is a gym.
In it, we have
a squat rack with a pull-up bar
a barbell
300+ lbs of weight plates
a bench
adjustable dumbbells
dip bars
gymnastics rings
And many other miscellaneous equipments (bands, cable pulley, parallettes, rollers, mats, etc.)
Oh, and there’s a Peloton in there as well.
It’s a lot.
But I also “need” all of this. Brittany and I like doing functional strength training (squats, bench, deadlifts) and calisthenics (pull-ups, dips, levers, etc.).
But since I have limited space and my son likes to explore, some things will have to go.
Plus, he’s going to need his own room soon.
That’s when I realized that I needed to find a way to downsize my home gym.
My Initial Reservations: Can Smart Home Gyms Be Useful For Someone Who Lifts Heavy?
Before getting the Vitruvian Trainer, my biggest question was whether it could replace my barbell and plates.
As someone who likes to lift heavy occasionally, I was worried that a smart home gym wouldn’t live up to the hype.
I’ve seen other gimmicky gym equipment over the years that have come and gone, so I wasn’t easily convinced.
I first heard of smart home gyms from a podcast. This person was touting the Tonal and how it revolutionized their home gym.
The problem is it only goes up to 200 lbs.
As someone who comes from a powerlifting background, I had my doubts. I would need more than 200 lbs, especially on the big compound lifts. Plus, I didn’t want to mount that thing on my wall.
That’s when I learned about the Vitruvian Trainer+.
The fact that it was a standalone platform and provided up to 440 lbs of resistance caught my eye. I also saw youtube videos of strong lifters struggling and shaking on the machine as they did squats and deadlifts.
At that point, I reached out to the company – told them my story, and they offered to send me one free of charge to give it a spin!
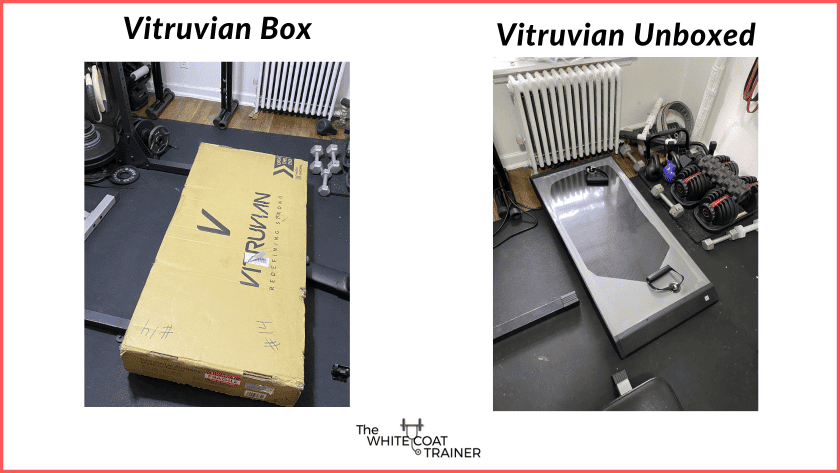
My First Impressions: Pleasantly Surprised
When the Trainer+ arrived at my apartment – I immediately stopped what I was doing and began to unbox it.
The first thing I noticed was how heavy and durable it felt – this thing is a beast. It took my wife and I together to lug it up the stairs.
The hardware is also solid.
The frame is made of a carbon fiber shell, and the accessories feel just as premium.
The Set-Up (Extremely Simple)
One great thing about the Vitruvian is that it is all one piece. You don’t need to assemble it.
Plug in the power cord, download the app, make a profile, scan the QR code on the side, and you are ready to go.
I was able to start using it within minutes of unboxing it.
The Foot Print
The Vitruvian Trainer+ is (obviously) a lot smaller than my current set-up, taking up less than 6 square feet of real estate.
It is also on wheels, which makes it easy to move around and store in a corner when not in use.
However, it is heavy!
The machine weighs about 80 lbs – so I prefer to leave it one space.
The Technology
Another thing that may be a pro or a con is that the machine only works through the companion app. The app is how you choose the exercises, the number of reps you plan to do, the weight, and the rest time between sets.
They improved the app significantly in June 2023, making it much easier to use.
You can sort the exercises by alphabetical order, muscle group, or equipment (barbell, rope, ankle straps, etc.).
I also love seeing all the exercises you can do on it – which is super motivational.
Brittany and I often find ourselves going through the expansive library and wanting to try all the different exercises.
The app also helps you track your progress and can automatically up your personal records as you get stronger.
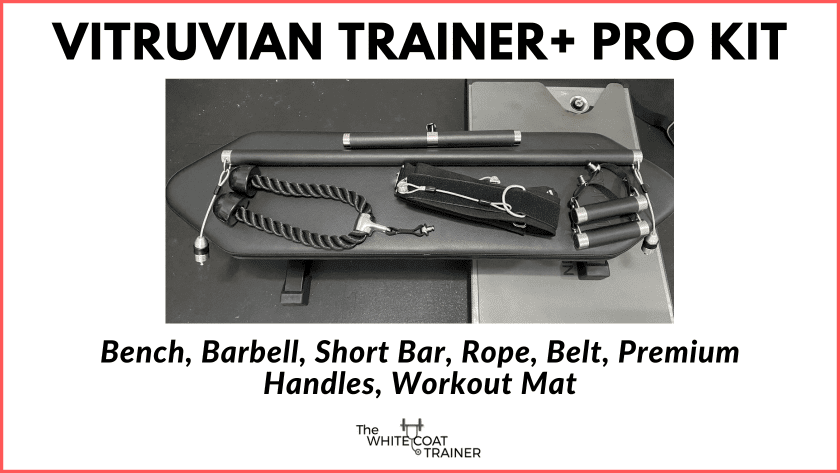
The Accessories
The standard Vitruvian comes with just a pair of handles, analogous to dumbbells, and some ankle straps.
You also have the option of getting an entry kit or a Pro-kit. The Pro-kit has a workout mat, a bench, a long bar (barbell), a short bar, a rope, a belt, safety cables, and premium handles.
It should go without saying that the extra equipment opens up a world of possibilities.
You need the Pro-kit to get the most out of the machine.
At the time of this writing, the Pro kit add-on costs an additional $500.
With these accessories, you can do almost every exercise you can think of. The best part is that swapping the accessories take seconds.
For example, I love doing the belt squat exercise.
If you do not have a belt squat machine, think about how cumbersome it is to do this exercise at a regular gym. You would need a dip belt, weight plates, and two elevated platforms, which can be awkward.
With Virtuvian, all you have to do is put on the belt, turn on the app, and you’re ready to go.
The Most Impressive Part: The Resistance System
The most impressive part of the machine is the resistance system. It uses magnetic resistance to generate the weight, and it is incredible.
It feels different, yet familiar.
But one thing is certain; the digital weight feels heavier than traditional weights.
I can easily bench 225 lbs + on any day with free weights, but I haven’t yet dared to approach that number on the Vitruvian.
I don’t know what it is exactly, but it probably has to do with the fact that you aren’t limited by gravity. With regular weights, you can cheat and use leverages to make the weight feel lighter/easier in certain positions.
With the Vitruvian, the weight is constant no matter where you are in the range of motion.
Other Benefits and Features of The Vitruvian
The Eccentric Only Mode
Another part of the resistance system that I love is the eccentric-only mode. This mode allows you to do heavy negatives, which you can’t easily replicate with traditional free weights.
The technology knows when you are doing the concentric and completely unloads the weight on the way up and then turns on the resistance on the way down.
We are all stronger on the way down than on the way up. As such, you can use heavy negatives to increase your strength and time under tension, which is a great way to stimulate hypertrophy.
I use the eccentric training mode for my lagging muscle groups (primarily my biceps).
There are three additional workout modes, old school, time under tension, and pump.
The “old school” mode is when the weights are constant on the concentric and eccentric portions. I don’t use either of the latter two options.
The Automatic Spotter
This feature is terrific.
The machine has an automatic spotter built into it that monitors your reps and your range of motion. If it detects that you are failing a repetition, the device flashes red and unloads the weight automatically.
As you can imagine, this feature prevents you from getting stuck in a dangerous position.
I almost never train to failure, but I have inadvertently gotten to that point a few times with the magnetic resistance.
It works beautifully.
I’ve even allowed it to turn on automatically when I just wanted to dump the bar off my back when doing squats :).
Easy Progressive Overload
Another great feature is that you can increase the weight of each exercise in one-pound increments!
Gone are the days of adding 5-10 lbs per exercise because you don’t have the exact weight plate adjustments.
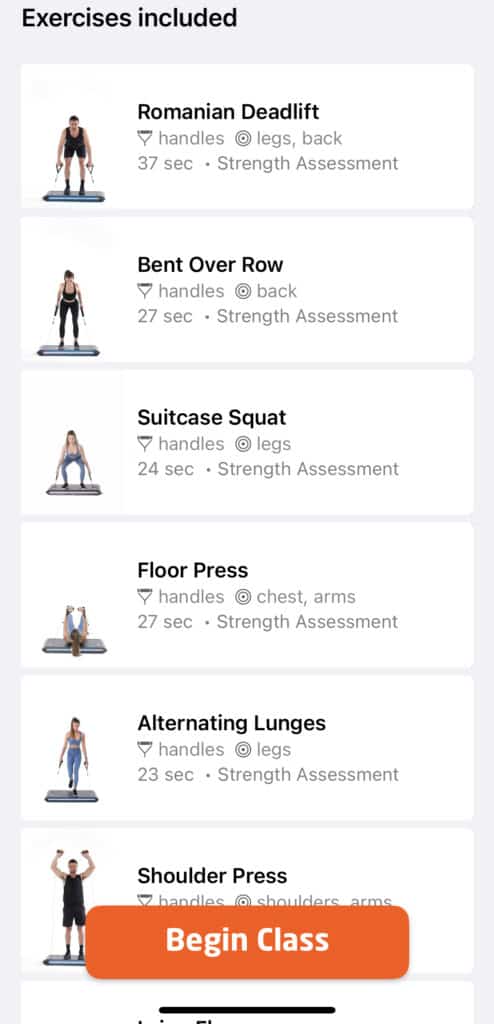
The Strength Assessments
Vitruvian also recommends you do a strength assessment workout to determine how much weight you can lift for each major muscle group.
It’s not necessary to do the assessment, but it can be helpful to learn how much you can lift using the adaptive technology.
The Strength Assessments as seen on the App
The machine also caps you at a certain weight on all exercises until you can prove to it that you can handle more, another built-in safety feature.
You Can Do Cardio Too
Since becoming a dad, I have started to focus my workouts more on long-term health. As such, I have been incorporating more cardio and aerobic work into my routine.
With the Trainer+, I can easily create custom exercise circuits with short rest periods to get my metabolic conditioning in. Using it, I’ve even emulated a Crossfit WOD (workout of the day).
You Can Train With A Partner Easily
This benefit should be talked about more.
The Vitruvian Trainer+ allows you to train with a friend very easily. I remember the days when Brittany and I shared the bench press. You could imagine how annoying it was to adjust the weight after each set (often by hundreds of pounds), as well as the height of the barbell.
With the Vitruvian, however, it takes a few seconds to adjust the weight for each person.
Moreover, each time you start an exercise, it automatically forces you to do three calibration repetitions so that the machine can learn your range of motion. That way, you don’t need to adjust the heights of anything, either!
Pre-Programmed Workout Classes
Lastly, the Vitruvian app also comes with follow along workout programs – which is great if you are looking for something specific or don’t have the time to create your own workouts from scratch. However, you do need the membership to use this feature.
I never follow an exercise class, so I have not looked into this, but Brittany has tried some of the workouts and enjoys them.
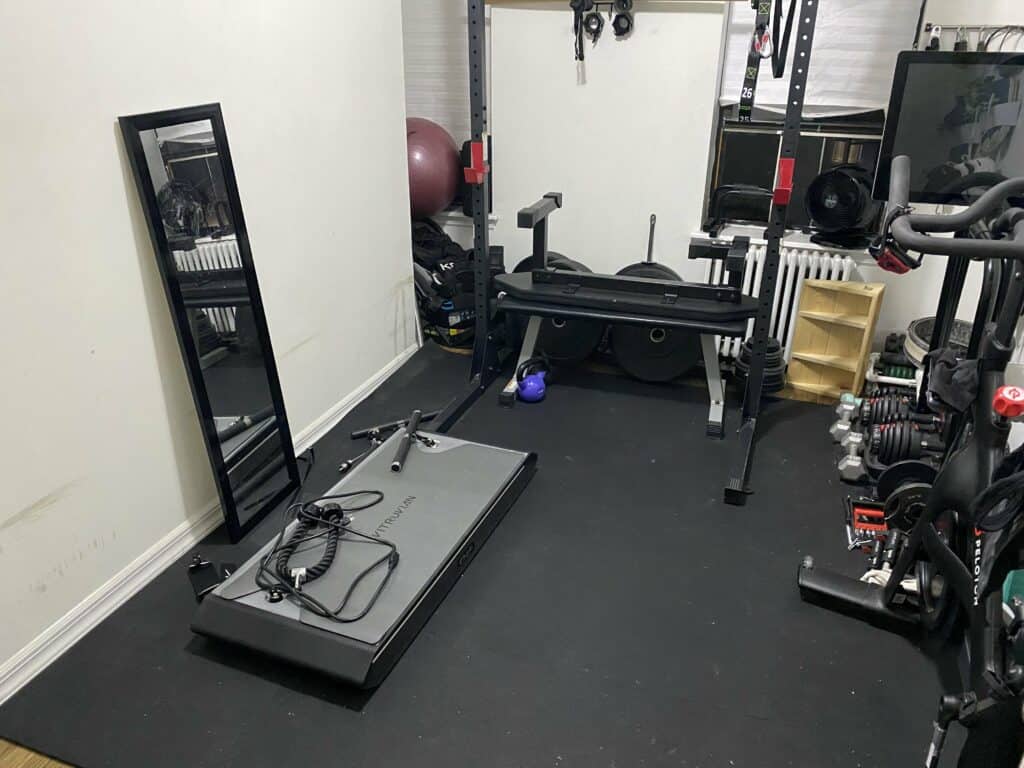
What The Trainer+ Replaced In My Home Gym
One of the biggest reasons for wanting to get the Vitruvian Trainer+ was to help me save space.
When I first got it, I was afraid to give up the classic gym staples such as barbells, plates, and dumbbells.
So when I got the V-Form, I just put the machine in the corner and added it to my already cluttered home gym.
However, after two weeks, Brittany and I realized we hadn’t used the vast majority of my equipment – the Vitruvian Trainer+ replaced them all.
We went ahead and rearranged the entire gym to put everything we weren’t using into the corner and allowed the Vitruvian to have the entire open floor.
Now, a month later, I have not used:
my squat rack
my bench press set-up
my barbell
my weight plates
my adjustable dumbbells
my cable pulley system
my rings
With that said, it has yet to replace everything. It cannot replace a pull-up bar or my dip bars.
Sadly, my pull-up bar (and the only one I will use) is attached to my rack.
As such, the rack is just in the corner for the sole purpose of having a pull-up bar there.
I cannot drill one into my walls and am not too fond of the doorway pull-up bars.
Once we move from this apartment, the barbell, plates, rack, and bench will not be coming with us.
What I Don’t Like About The Trainer+
Okay, so now let’s get into the cons. These aren’t a big deal, but it could be a deal breaker to some.
You Need The Pro Kit
The Pro kit is a must for the Vitruvian.
With it, your exercise selection and variety will increase by a lot!
The problem is, this machine is already expensive. The need to spend an extra $500 for a bunch of accessories is a tough pill to swallow, but if you are looking for the best experience and are serious about lifting, you need to get it.
*You also need to have the V-Form accessories. Other third-party handles will not work with the machine.
The Cost
The Vitruvian Trainer+ is expensive. The retail cost is ~$3000. They have a financing option, but the price will be a big turn-off for most people. If you want to take advantage of the membership, that will add a monthly subscription fee of $39.
I can’t blame them. For a business to remain sustainable, they need recurring revenue, and I want to see them succeed.
My Trainer+ included a year-long membership, so I can only comment on using the machine with it. However, others have said that the membership isn’t necessary to get the most out of this machine.
A Handful of Exercises Are Awkward
The Trainer+ has incredible versatility, supporting well over 100 exercises. Brittany and I are constantly trying to find new movements that were previously impossible to do in our home gym.
However, a couple of the movements are awkward, and the line of pull isn’t where it should be.
A quick example is the Pallof Press. The resistance is supposed to be on your side and rotating you laterally. However, since the resistance is coming from the ground on the V-Form Trainer, the Pallof Press isn’t really feasible. Thankfully, I found only a few exercises that could be better, like this one.
No Overhead Pulling Movements
This con has been beaten to death. Everyone knows that the V-Form Trainer+ does not allow you to do overhead pulling movements, specifically the lat pulldown.
I also can’t hang from a bar to do pull-ups.
I heard they are creating a new overhead attachment called the V-Frame to combat this issue, although there has yet to be an official word on the release date.
Other Small Pet Peeves
Another minor pet peeve is that if you use it right after someone else, that person needs to remember to disconnect the machine from their app.
Brittany is the first to use it at 5 AM; I go at 5:30.
We do this to switch parenting duties if the baby wakes up when one of us is training.
I often have to remind her to go on the app and click the disconnect button before I can log in and start my session.
Another pet peeve is that some exercises don’t register perfectly when you are doing your calibration reps.
For example, sometimes, I can’t get the resistance to turn on during the correct portion of a calf raise.
Similarly, when doing squats and bench presses, I cannot figure out how to turn the weights on at the top of the movement. It always turns on at the bottom of the rep for those two exercises. It’s not a big deal, but worth noting.
Lastly, the cables might touch your head when bringing the handle overhead, like in the tricep rope extension.
Not deal breakers, just minor annoyances.
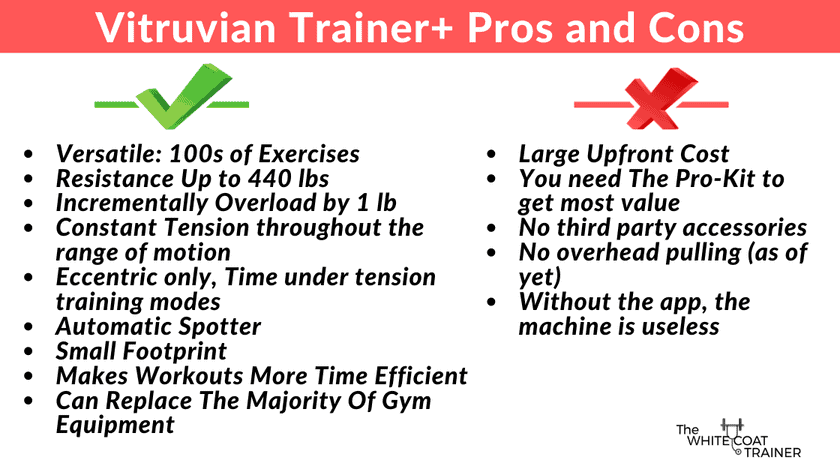
The Pros and Cons
Now let’s list out all of the pros and cons.
Pros
Versatile – Supports over 100 exercises to train the entire body, including the big 4 (squat, deadlift, overhead press, bench press).
Plenty of Adaptive Resistance – Includes up to 440 lbs of resistance which is great for experienced lifters who are already strong.
Comfort- I don’t know what it is, but some exercises feel smoother and more natural on the Trainer+. It’s like everything a Smith Machine was trying to be but infinitely better.
Incremental Resistance Adjustment – Allows you to adjust resistance in 1 lb increments for precise progressive overload.
Constant Tension – Unlike dumbbells, the weight is constant no matter where you are in the range of motion
Different Training Methods– The technology allows you to use different training modes (old-school, eccentric only, time under tension, and pump).
Automatic Spotter – The machine monitors your reps and range of motion and unloads weight automatically if you are failing a rep.
Form Factor and Design– The machine is well-built, has a small footprint, and takes up only 6 square feet of space.
Time efficiency– You can change loads from five pounds to hundreds of pounds in seconds. You can also change exercises/accessories in seconds.
Functionality– This machine replaces the majority of gym equipment and saves you a lot of storage space
Cons
Cost – At nearly $3000, this isn’t an impulse buy for most people. The accessory kit is a must-have and will cost an additional $500. The all-access membership is an additional $39 per month, but if you create your own custom workouts, you don’t need it.
V-Form Accessories Needed – This machine only works with V-Form accessories and not third-party handles or attachments.
No overhead Pulling – You cannot do lat pulldowns or hang from a bar (at least not yet).
The Vitruvian App- You need a phone with Bluetooth connectivity to use this machine. It has no built-in screen, which can be a plus or a minus. I prefer not to have an attached screen to save even more space.
Other Frequently Asked Questions
How Does It Compare To The Competitors?
There are a few other smart fitness machines on the market. One notable competitor is the Tonal.
The Tonal has a few benefits, which include:
A built-in screen which means you don’t need a smartphone to use it
Movable arms, which allow you to do overhead pulling movements and standing horizontal exercises
However, the cons outweigh the pros for me.
It only supports a maximum load of 200 pounds
It has to be drilled into your wall, so it is not portable
Apparently, the device is useless without the membership
There are other similar products like the Speediance and Oxefitt, which overcome two of these cons, but they still only support 200 pounds of resistance.
How Do You Justify The Price?
The Vitruvian Trainer+ starts at >$2900. While the initial investment is steep, the value it offers justifies the price.
First, the Trainer+ replaces the majority of standard gym equipment, which would cost a few thousand dollars anyway. Its compact size is also essential for me living in NYC.
Second, the ability to get a complete full-body gym workout without making noise at 5 AM while my son sleeps in the other room is priceless.
Third, for someone like me who values their time and wants an efficient workout, the Trainer+ is an excellent investment. I no longer need to waste time racking and unracking weights or setting up equipment between exercises.
It’s difficult to put a price on convenience.
Lastly, I am not a newbie. Despite my training experience, this machine has motivated me to work out even more than I normally do. Brittany has exercised on it every single day since we have gotten it.
Becoming a dad has made space a precious commodity in our NYC apartment.
As a former powerlifter who likes to do functional strength training, I needed a way to still get my workouts in at home with limited space.
The Vitruvian Trainer+ is everything I was hoping it to be. It has allowed us to continue training like we were with our traditional weights but in a more compact and efficient package.
Plus, it has enough weight/resistance to last our lifetime. (I no longer plan on squatting or deadlifting over 400 lbs).
What’s more, this smart device helps me save so much time during my workouts. Gone are the days of constantly racking and unracking weights and wasting time setting up equipment between exercises.
Not only does the Trainer+ make my workout routines more efficient, but it also offers me endless exercise possibilities. Plus, I don’t have to worry about making noise at 5 AM and risk waking up our son or the neighbors.
The machine has proven to be a real game-changer, and I recommend it to anyone looking for a quality smart home gym.
Alex Robles, MD, CPT / Brittany Robles, MD, MPH, CPT
Alex & Brittany Robles are physicians, NASM Certified Personal Trainers, and founders of The White Coat Trainer: a resource dedicated to improving the health and fitness of busy professionals using time-efficient strategies. Their advice has been featured in My Fitness Pal, Prevention, Livestrong, Reader’s Digest, Bustle, The Active Times, and more. Learn more about them here.
We live in a day and age that is ridden with instant gratification.
Never is the need for immediate results more keenly felt than in the fitness industry.
Our social media feeds are laden with products and routines promising quick results.
In fact:
A day doesn’t pass where I’ve yet to encounter a faceless avatar online who still believes protein supplements are some sort of magic potion that will yield unprecedented muscle mass without having to lift weights.
For many, anything requiring time, effort and patience is shunned in favour of shiny fads, shortcuts or ‘hacks’.
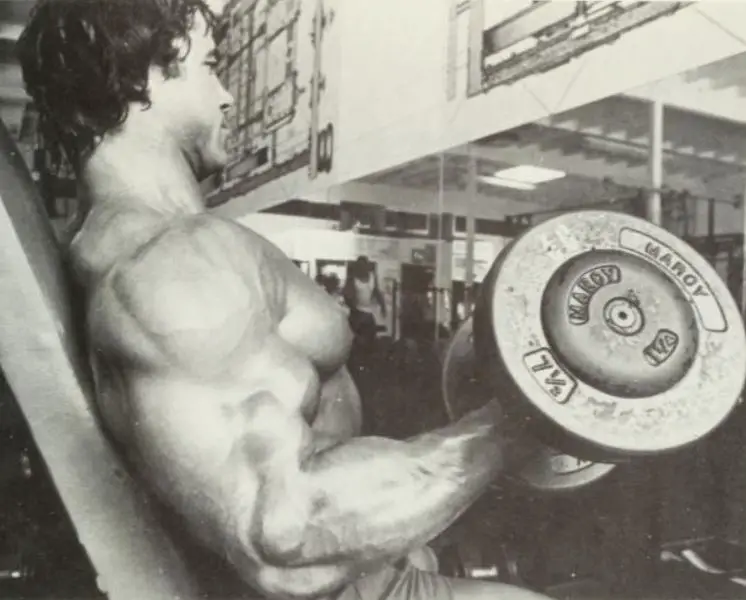
When it comes to building championship winning physiques, we’ve covered numerous bodybuilding legends including Larry Scott, Arnold Schwarzenegger and Frank Zane who have gone on to demonstrate that mass, symmetry, strength and aesthetics can all co-exist on one frame.
This isn’t something you can easily do in a ‘6-week summer sizzler hypertrophy program’ being flogged by the average juiced up influencer on Instagram.
However,
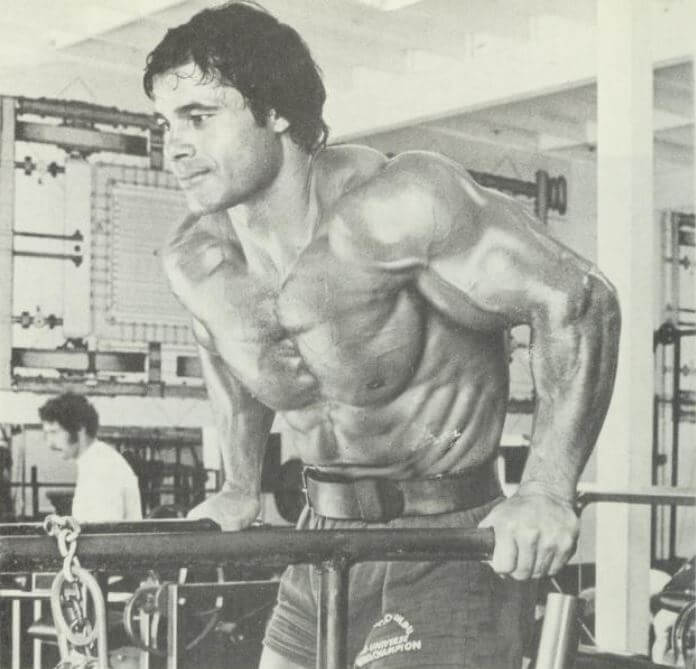
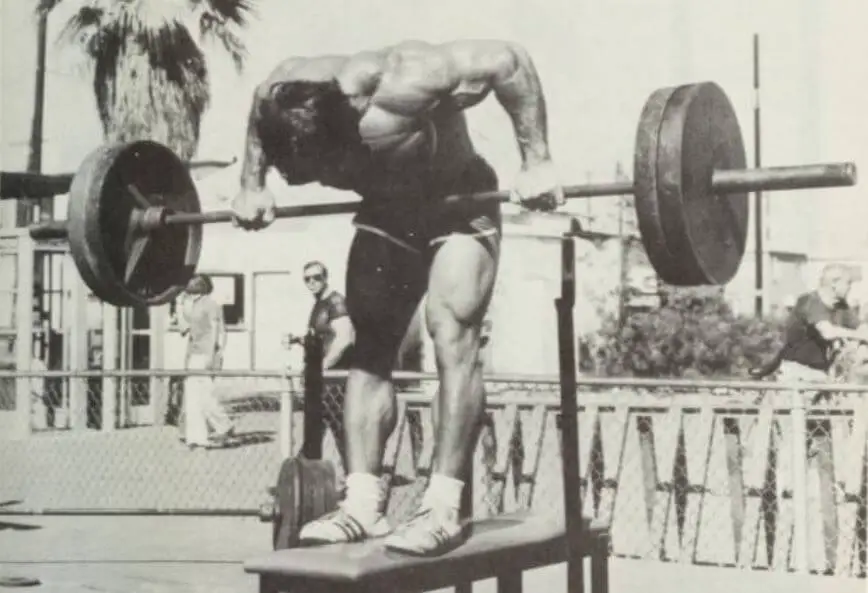
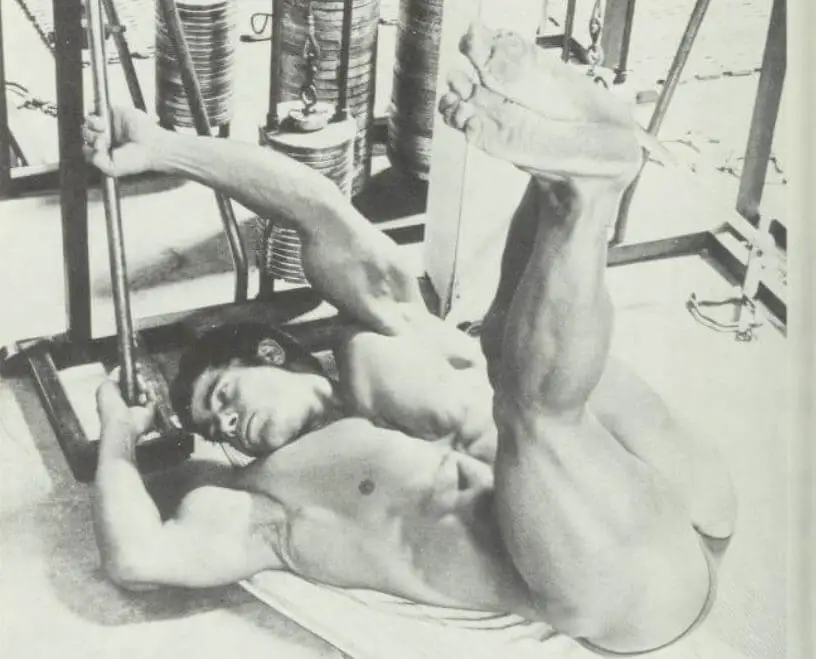
One man, who arguably might have been one of the strongest men to ever live, lifting cars, bending steel bars and running whilst carrying a fridge on his back epitomised the hard work, consistency and patience needed to develop a physique all blokes who enter any gym aspire to.
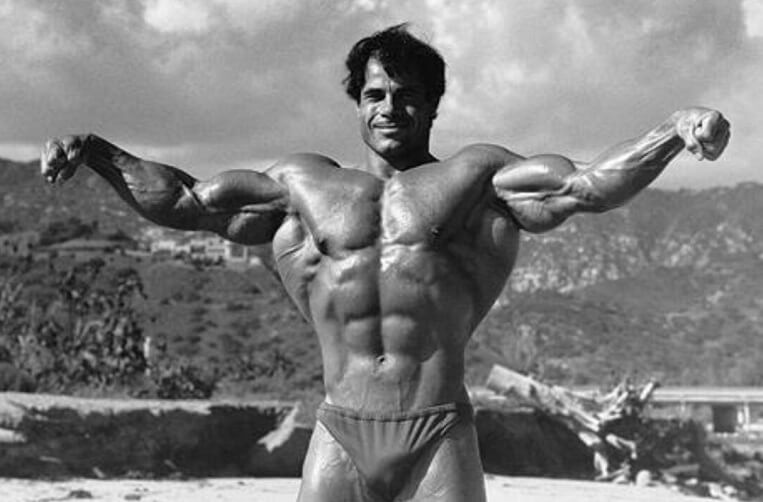
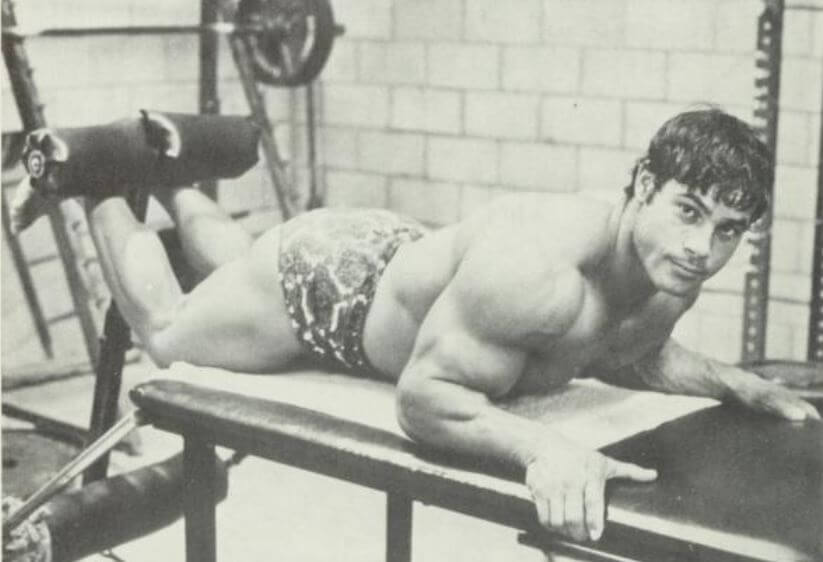
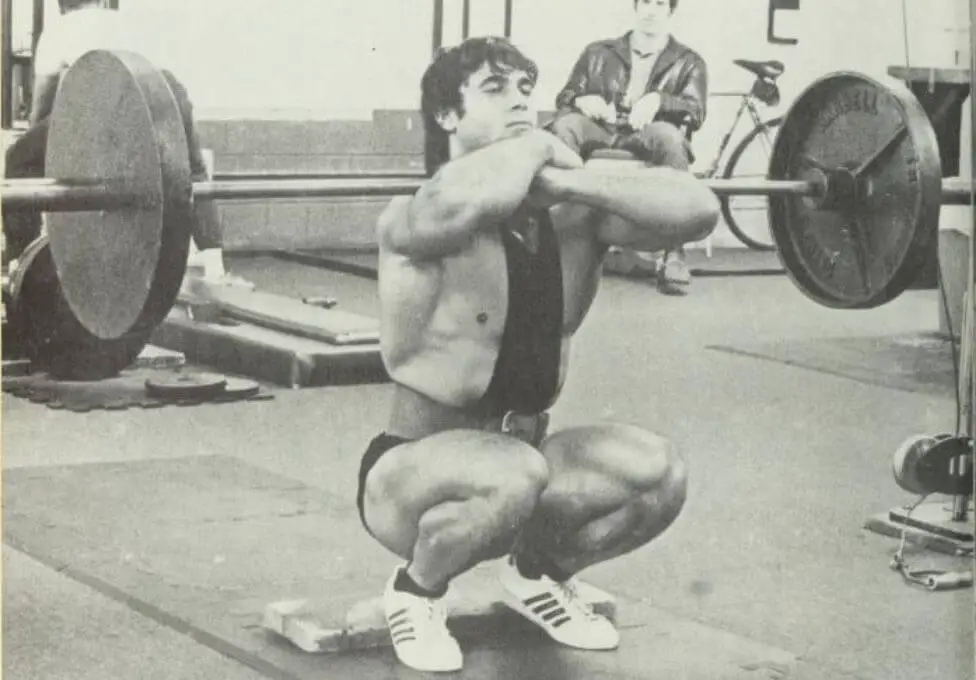
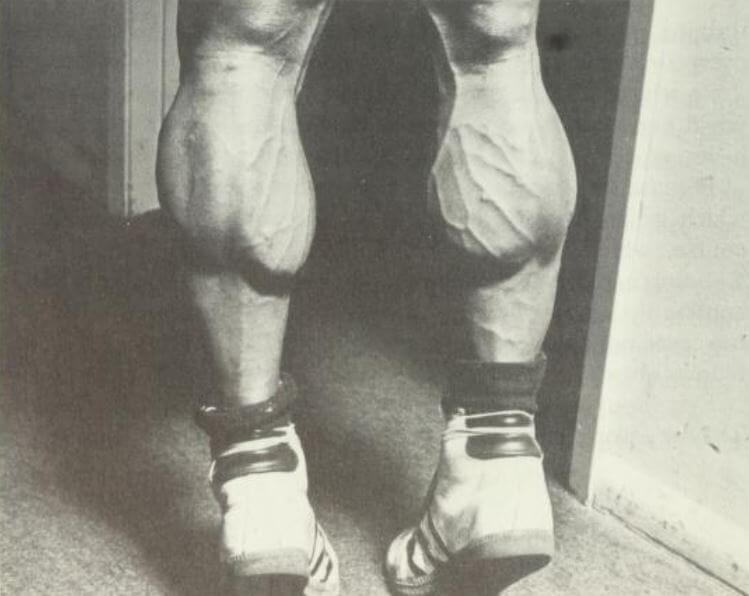
That man was none other than Franco Columbu.
In this post we’ll be covering two workout routines outlined in his book: ‘Winning Bodybuidling’.
Let’s get into it.
Who is Franco Columbu?
Franco Columbu was born in Sardinia, Italy on August 7th, 1941.
A son to shepherds, Columbu was of scrawny stature and would often get into scraps with kids from his local village growing up.
As such, Columbu would later take up boxing and discover a real talent for it.
In an interview with the Miami Herald in 1982, Columbu explained:
“I was always skinny until I was 11, I got beat up a lot. Then one day, I started beating people up. Nobody could touch me.”
Not one to shy away from attention, in his book ‘Coming on Strong’, Columbu reflects:
“As soon as it dawned on me that people noticed me when I competed, I made a point to become good at it.”
He continued to work as a shepherd and a bricklayer in his village, dreaming of fame through boxing whilst training at a gym which was 10 mile bike ride from where he lived.
Columbu developed significant strength and speed to defeat some early opponents, but decided to leave his native Italy to train in Munich, Germany, winning more than 30 amateur fights before quitting boxing altogether in pursuit of weightlifting and bodybuilding.
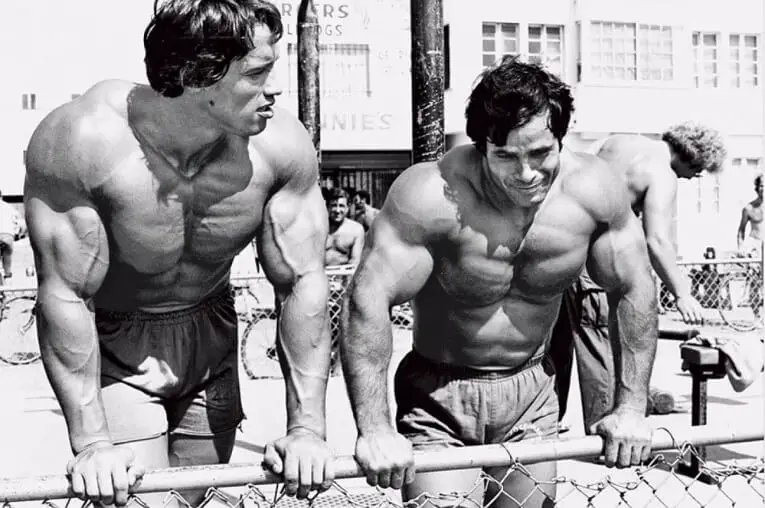
It wasn’t until Columbu moved to Germany that he met Arnold Schwarzenegger at a bodybuilding competition in Munich in 1965.
From there, Columbu would go on to form a lifelong friendship with Schwarzenegger who would both frequently train and compete with one another.
Check out the below video of Columbu and Schwarzenegger in a head-to-head posedown during the 1975 Mr. Olympia competition:
The pair would later move to California during differing times in the late 60s, both taken under the wing of Joe Weider (founder of IFBB and the editor of several bodybuilding and fitness-related magazines) who would give them each a weekly allowance to train at Gold’s Gym in Venice Beach.
However,
The stipend from Joe Weider wasn’t enough to sustain them, so both Columbu and Schwarzenegger would go on to form a bricklaying business in order to make ends meet.
This also meant that they could still get a good workout and tan in the sun when they weren’t training in the gym.
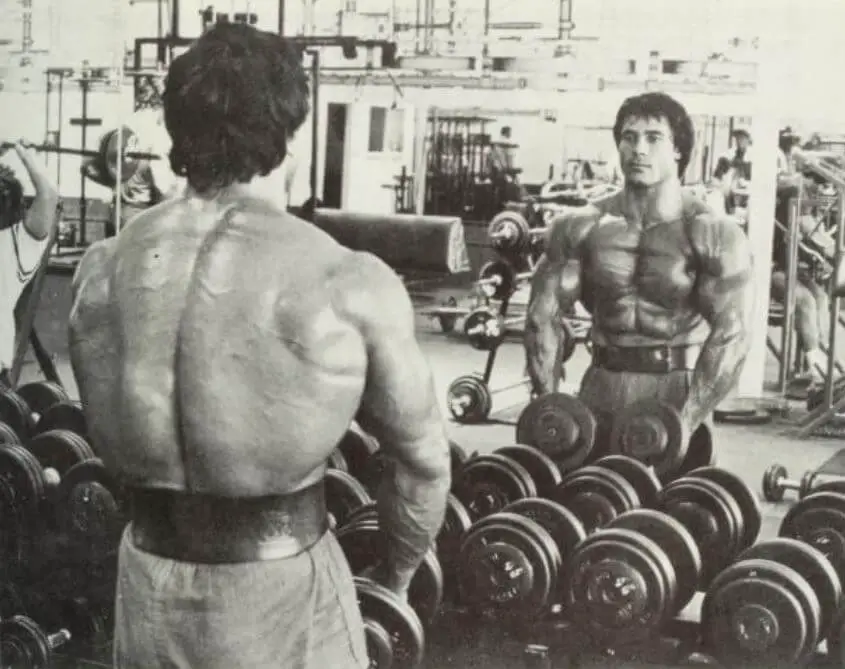
Despite only standing at 5 foot 5 inches with a competition weight of 84kg (185lbs), Columbu’s feats of strength were simply mind-blowing.
Some of his personal powerlifting records included being able to clean and jerk with 400lbs (181 kg), perform a bench press with 525lbs (238 kg), squat with 655lbs (297 kg) and execute a deadlift with 750lbs (340 kg).
He could also burst a hot water bottle by blowing into it in 55 seconds which he was entered into the Guinness Book of Records for.
If that wasn’t enough,
He also featured in the inaugural ‘World’s Strongest Man’ competition in 1977, but only managed fifth place.
Some of his notable bodybuilding successes were placing first in the lightweight division of both the 1974 and 1975 Mr. Olympia competitions, before winning the competition overall (with the removal of weight classes) in both 1976 and 1981.
Overview
Franco Columbu’s Intermediate Workout
Columbu’s intermediate workout is aimed at those with some weightlifting experience as well as athletes competing in sports who are in ‘better than average’ shape.
The intermediate workout should be performed at least 3 times a week on consecutive days.
Columbu recommended the following order to train each muscle as follows:
Lats (mid and upper back)
The effectiveness of this programme lies in its high repetitions (15 – 20) in order to build size, power and speed spread across 21 different exercises.
This includes 3 exercises for the back, legs and abdomen and 2 for every other body part.
Because this routine is a full body workout, it is a great plan to follow if you’re strapped for time but still want to build muscle as quickly and efficiently as possible.
Undoubtedly, if you are an intermediate lifter, it won’t take long until you start seeing some noticeable results.
Performing full body workouts are great way to burn through a lot of calories meaning that not only will you build muscle, power and speed, but you’ll also drop a few percentage points in body fat.
Additionally, full body workouts were the preferred training method of many of the pre-steroid greats including Steve Reeves, so you can train with the assurance that you will be sculpting a completely balanced physique.
On the surface, whilst Columbu’s intermediate workout seems rather simplistic to those with more experience, performing around 1,400 reps in a single training session will test anyone mentally so this routine is not to be sniffed at.
Franco Columbu’s Advanced Workout
Columbu’s advanced workout is targeted at serious bodybuilders and not only for those looking to compete on stage.
Each workout has been specifically formulated to target each muscle group for maximum hypertrophy, but for also shape and symmetry to build a traditional ‘golden era’ physique.
The advanced workout consists of 2 workouts performed 3 times a week for a total of 6 consecutive days with Sundays reserved for rest.
The training plan is split into the following:
Chest, Shoulders, Arms and Abs
Whilst there are only two splits in this programme, don’t be fooled. Columbu was a notoriously hard-worker and would often go to leaps and bounds to truly challenge himself
In particular:
Much like Arnold Schwarzenegger’s Blueprint to Mass and Blueprint to Cut routines, Columbu’s advanced workout incorporates muscle building principles including supersets, tri-sets and giant sets to leave no stone unturned.
This is a no-brainer as the two were inseparable at the gym and would always push each other to reach the peak of their physiques.
Not only will training this way ensure that all of your bases are covered, you’ll be training each body part with optimal frequency followed by the occasional superset, tri-set and/or giant set to truly elicit muscle growth, size and strength.
Columbu is quick to mention that his advanced workout is only for those with at least 8 to 10 months’ worth of bodybuilding experience under their belt consisting of beginner and/or a combination of beginner and intermediate workouts.
If you choose to ignore this advice, proceed at your own peril.
Why?
Depending on which body parts you’ll be training, the working sets can typically range from 55 up to 90 which is a ridiculous amount of volume so the risk of injury is high if you don’t know what you’re doing.
However, if you’re up for the challenge, read on…
With that said:
Let’s get into each routine.
Franco Columbu Workout Review
Intermediate Workout
Exercise
Sets
Reps
Standing Calf Raises
3
15 – 20
Seated Calf Raises
3
15 – 20
Barbell Squats
3
20
Leg Extensions
3
20
Lying Leg Curls
3
20
Chin-Ups (Wide or Narrow Grip)
3
10
Bent Over Barbell Rows
3
15 – 20
Prone Hyperextensions
2
15
Barbell Bench Press
3
20
Dips
3
20
Dumbbell Lateral Raises
3
20
Alternating Dumbbell Front Raises
3
20
Dumbbell Curls
3
15
Barbell Curls
3
20
Lying Triceps Extension
3
20
Close-Grip Barbell Bench Press
3
20
Dumbbell Wrist Curl
3
20
Reverse Barbell Wrist Curl
3
20
Side Bends
5
25
Leg Raises
5
25
Sit-Ups
5
25
Advanced Workout
Monday: Back, Legs and Abs
Exercise
Sets
Reps
Chin Ups (Behind The Neck)
5
10
Wide-Grip Chin Ups
5
10
Bent Over Rows
3
8
Barbell Rows
3
8
Close-Grip Chin Ups
4
Failure
Alternating One Arm Dumbbell Row
4
8
Leg Extensions
2
20
Leg Curls
3
13
Barbell Squat
6
10
Barbell Front Squat
2
10
Hack Squat
2
10
Standing Calf Raises
8
20
Sit Ups (superset with following exercise)
2
25
Hanging Leg Raises (superset with following exercise)
2
Failure
Leg Raises (superset with following exercise)
2
Failure
Side Leg Raises (superset with following exercise)
2
25
Tuesday: Chest, Shoulders, Arms and Abs
Exercise
Sets
Reps
Barbell Bench Press
4
10, 8, 6, 4
Incline Barbell Bench Press
4
8
Lying Laterals (Flys)
3
8
Dips
3
10
Barbell Bench Press with Close Grip (superset with following exercise)
3
10
Pullovers
3
10
Standing Barbell Press
3
10, 8, 6
Seated Press Behind Neck
3
8
Lateral Raises
4
8
Incline Rear Deltoid Raises
3
8
Front Dumbbell Raises
3
8
Upright Rows
3
10
Seated Incline Dumbbell Curls (superset with following exercise)
4
8
Lying Triceps Extensions
4
8
Barbell Curls (superset with following exercise)
4
8
Lying Close-Grip Triceps Press
4
8
Preacher Curl (superset with following exercise)
4
8
Triceps Pushdown
4
10 – 15
Concentration Curls
3
10
Triceps Dumbbell Extensions (superset with following exercise)
3
10
Reverse Barbell Curl
3
10
Barbell Wrist Curls
4
12
Dumbbell Wrist Curls (superset with following exercise)
3
10
Barbell Reverse Wrist Curls
3
10
Sit Ups (superset with following exercise)
2
25
Hanging Leg Raises (superset with following exercise)
2
Failure
Leg Raises (superset with following exercise)
2
Failure
Side Leg Raises (superset with following exercise)
2
25
Wednesday: Back, Legs and Abs
Exercise
Sets
Reps
Chin Ups (Behind The Neck)
5
10
Wide-Grip Chin Ups
5
10
Bent Over Rows
3
8
Barbell Rows
3
8
Close-Grip Chin Ups
4
Failure
Alternating One Arm Dumbbell Row
4
8
Leg Extensions
2
20
Leg Curls
3
13
Barbell Squat
6
10
Barbell Front Squat
2
10
Hack Squat
2
10
Standing Calf Raises
8
20
Sit Ups (superset with following exercise)
2
25
Hanging Leg Raises (superset with following exercise)
2
Failure
Leg Raises (superset with following exercise)
2
Failure
Side Leg Raises (superset with following exercise)
2
25
Thursday: Chest, Shoulders, Arms and Abs
Exercise
Sets
Reps
Barbell Bench Press
4
10, 8, 6, 4
Incline Barbell Bench Press
4
8
Lying Laterals (Flys)
3
8
Dips
3
10
Barbell Bench Press with Close Grip (superset with following exercise)
3
10
Pullovers
3
10
Standing Barbell Press
3
10, 8, 6
Seated Press Behind Neck
3
8
Lateral Raises
4
8
Incline Rear Deltoid Raises
3
8
Front Dumbbell Raises
3
8
Upright Rows
3
10
Seated Incline Dumbbell Curls (superset with following exercise)
4
8
Lying Triceps Extensions
4
8
Barbell Curls (superset with following exercise)
4
8
Lying Close-Grip Triceps Press
4
8
Preacher Curl (superset with following exercise)
4
8
Triceps Pushdown
4
10 – 15
Concentration Curls
3
10
Triceps Dumbbell Extensions (superset with following exercise)
3
10
Reverse Barbell Curl
3
10
Barbell Wrist Curls
4
12
Dumbbell Wrist Curls (superset with following exercise)
3
10
Barbell Reverse Wrist Curls
3
10
Sit Ups (superset with following exercise)
2
25
Hanging Leg Raises (superset with following exercise)
2
Failure
Leg Raises (superset with following exercise)
2
Failure
Side Leg Raises (superset with following exercise)
2
25
Friday: Back, Legs and Abs
Exercise
Sets
Reps
Chin Ups (Behind The Neck)
5
10
Wide-Grip Chin Ups
5
10
Bent Over Rows
3
8
Barbell Rows
3
8
Close-Grip Chin Ups
4
Failure
Alternating One Arm Dumbbell Row
4
8
Leg Extensions
2
20
Leg Curls
3
13
Barbell Squat
6
10
Barbell Front Squat
2
10
Hack Squat
2
10
Standing Calf Raises
8
20
Sit Ups (superset with following exercise)
2
25
Hanging Leg Raises (superset with following exercise)
2
Failure
Leg Raises (superset with following exercise)
2
Failure
Side Leg Raises (superset with following exercise)
2
25
Saturday: Chest, Shoulders and Arms
Exercise
Sets
Reps
Barbell Bench Press
4
10, 8, 6, 4
Incline Barbell Bench Press
4
8
Lying Laterals (Flys)
3
8
Dips
3
10
Barbell Bench Press with Close Grip (superset with following exercise)
3
10
Pullovers
3
10
Standing Barbell Press
3
10, 8, 6
Seated Press Behind Neck
3
8
Lateral Raises
4
8
Incline Rear Deltoid Raises
3
8
Front Dumbbell Raises
3
8
Upright Rows
3
10
Seated Incline Dumbbell Curls (superset with following exercise)
4
8
Lying Triceps Extensions
4
8
Barbell Curls (superset with following exercise)
4
8
Lying Close-Grip Triceps Press
4
8
Preacher Curl (superset with following exercise)
4
8
Triceps Pushdown
4
10 – 15
Concentration Curls
3
10
Triceps Dumbbell Extensions (superset with following exercise)
3
10
Reverse Barbell Curl
3
10
Barbell Wrist Curls
4
12
Dumbbell Wrist Curls (superset with following exercise)
3
10
Barbell Reverse Wrist Curls
3
10
Examination
Intermediate Workout
Columbu’s intermediate workout is a traditional silver-era full body training programme with 3 working sets to be completed per targeted muscle.
As mentioned earlier:
After completing this routine at the maximum of 20 reps per exercise, you would’ve performed well over 1,400 reps in your training session which is an absolute insane amount of volume.
For context, the average bro split (e.g. back, biceps and abs) will contain anywhere between 400 – 500 reps in a given session which is often performed at an intermediate/advanced level.
Thus,
This routine will undoubtedly push you out of your comfort zone and will yield some incredible results.
However,
Depending on what your fitness goals are, this may or may not be a good routine for you.
Namely, the high endurance reps are typically good for athletes who compete in high-level sports over a set period of time (e.g. football, boxing etc).
For the purposes of building muscle, this isn’t necessarily a bad thing when you’re at an intermediate level, but long-term, it will be quite easy to stagnate if you’re not proactively changing how you approach this routine (i.e altering the sets, reps and poundage).
Therefore,
If building muscle is your primary focus, it is advisable to drop the number of reps from 15 – 20 to 8 – 12. With this drop, you should also look to increase the poundage for each exercise to challenge the working muscle and promote hypertrophy.
For example, you might look to add 2.5kg (5lbs) to the bar on each side when performing barbell squats, bent over rows, bench press and barbell curls after 4 weeks.
Of course:
If you do adjust this plan, you are no longer performing Columbu’s routine in the way it was designed and will thus not achieve the results it was set out to achieve either.
Nevertheless,
There’s no harm in amending this routine to adapt it to your goals as the exercises themselves and the order in which they are performed are all excellent for building muscle.
Advanced Workout
Columbu’s advanced workout is arguably one of the most strenuous and thorough training plans that exist.
Not only does each day consist of a lot of volume, but you’ll be lifting anywhere between 75% – 90% of your 1RM (one rep max) on certain exercises that will also build strength and power alongside lean muscle mass.
In particular:
Training your chest, shoulders, arms and abs might prove to be the most taxing days of all as you’ll be performing a total of 28 exercises in comparison to 16 exercises on days where you’ll be training back, legs and abs.
If that wasn’t enough,
You will be building a set of washboard abs that will give Superman a run for his money, targeting them 5 times a week versus all other muscle groups being worked 3 times a week.
However,
It’s important to understand that Columbu was on an exorbitant amount of juice and thus, his body was primed to handle the amount of volume entailed and was able to recover a lot quicker than most.
With that aside:
There’s no denying that Columbu was one of the most hardworking bodybuilders that ever entered a gymnasium and this is reflected in his advanced training plan.
Thus,
No matter how advanced you are, his workout is not for the feint of heart and it’s important to listen to your body at all times and ensure you’re in the right frame of mind before beginning this plan.
It is very easy to lose motivation when the workout seems never ending, so stay focused on your goal(s) and the task at hand.
As mentioned earlier:
Columbu would throw in the occasional superset, tri-set and giant set to spice things up.
This has the benefit of not only placing the working muscle under significant stress, but it’s also a great way to burn a huge amount of calories and get out of the monotony of performing 3 or 4 sets of the same exercise consecutively.
As a result, this will ensure you maintain enthusiasm and avoid inertia.
In essence,
The advanced workout is designed to challenge you both physically and mentally so you must be willing to work your arse off in order to reap the rewards.
Notes
Cycle
Intermediate Workout
The intermediate workout is to be performed 3 times a week with a day of rest in between.
Columbu mentions you can perform this routine for a maximum of 6 months unchanged.
Advanced Workout
How long you should be cycling this workout was not clearly defined in Columbu’s book ‘Winning Bodybuilding’.
However,
Given the fact that you’ll be performing 6 training sessions each week and the amount of volume included, a good starting point is to cycle this for 8 – 12 weeks.
Duration
Intermediate Workout
The intermediat workout is designed to be as quick and efficient as possible.
Columbu prescribes that you spend no longer than 1 hour and a half performing this training plan with as little rest as possible in between sets.
He believed that if you needed to rest longer than 30 – 45 seconds you were simply going too heavy and therefore should scale the weights back so that you can perform this entire routine without stopping.
Advanced Workout
The advanced workout should be completed within 2 hours.
Like the intermediate workout, every set in the advanced workout should be completed quickly and efficiently, keeping rest times short (30 – 45 seconds) but striving to complete the entire plan without stopping.
Progression
As mentioned previously, the intermediate workout is to be performed unchanged for 6 months.
However,
Columbu prescribes additional progressive measures to the advanced workout to continue challenging yourself.
Below is a breakdown of what he recommends for each exercise:
Bench Press
Add additional weights and sets gradually.
Lying Laterals (Flys)
Add an extra set in your second or third week.
Dips
Add additional weights and work your way up to 4 sets within a few weeks.
Standing Barbell Press
Start with a moderate weight and increase the poundage on each set until you are able to get only six reps out of your final set (which should be your third set when starting the advanced workout).
Add a fourth set when you feel comfortable with it.
Seated Press Behind Neck
Perform the reps without pausing, 3 sets of 8 reps first. Slowly work your way up to 4 sets.
Lateral Raises
Work your way up to 4 sets, resting no more than 45 to 60 seconds between sets.
Wide Grip Chin Ups
This exercise is to be performed with additional weight using either a lifting belt or holding a dumbbell between your legs. Rest no longer than 60 to 90 seconds.
Bent Over Rows
Perform 3 sets of 8 reps first, adding a 4th set when you’re ready.
End Barbell Rows
Exercise is to be performed with 3 sets of 8 reps first with a 4th set added later on.
Leg Curls
To be performed with 3 sets of 13 reps in the first month, then add a set a month until you’ve reached 6 sets.
Barbell Front Squats
2 sets to be performed in the first month and 3 sets thereafter.
Calf Raises
In his book ‘Winning Bodybuilding’, Columbu mentions the following about performing calf raises:
“Most importantly, go all the way up and all the way down. Increase the weight constantly. Don’t be afraid to get into the multiple hundreds. I do 8 sets of 20 reps, as rapidly as I can, but four sets are plenty to begin with.”
Arm Training
For the first two months of advanced training, you’ll be required to perform seated incline dumbbell curls, lying tricep extensions, barbell curls, lying close-grip triceps press, preacher curls and triceps pushdown in straight supersets.
You’ll then be required to add the following exercises into your regime: concentration curls, triceps dumbbell extensions, reverse barbell curls, barbell wrist curls, dumbbell wrist curls and barbell reverse wrist curls.
Waist Training
Sit ups are to be performed on a decline bench with the overall ab routine to be performed twice through in your first month, three times through on your second month and four times through thereafter.
Note the above plan starts with performing each exercise twice through.
Cardio
Columbu recommends you perform regular amounts of cardio in order to improve overall muscle definition and losing stubborn fat.
In particular, his preferred form of cardio was running.
This included running 2 miles on a level grassy surface in under 17 minutes a few times a week.
He mentions in his book:
“I’m a devout believer in running, not just as a warm-up but as an actual supplement to my weight training.As a bodybuilder, you’ve already got the finest running tools: stamina, discipline, and tougher, stronger legs.”
In terms of using running as a way of warming up before embarking on any of his workouts, he prescribes listening to your body to dictate how long you should be running for:
“Just let your body tell you. You’ll know when you’ve reached the point where further running will borrow on the energy you need for training.”
Attitude
In Columbu’s book ‘Winning Bodybuilding’ a chapter is dedicated to highlighting the importance of having the right mental state for training effectively, something that is often overlooked when it comes to building muscle.
He states:
“You will also find it easy to talk yourself out of a proper workout if you enter the gym with unsolved problems.
Either deal with your problems before training, or find the discipline to put them out of your head until you’re finished.
You just cannot work out well while worrying. Your concentration has become broken, your movements are very likely to be uncommitted ones, and that usually means trouble.
At the very least, you’ll have an unproductive workout; far worse, you’re asking for an injury.”
Like Steve Reeves, Columbu also believed one should avoid socialising in the gym and to simply reserve your energy and focus to concentrate on each set and repetition:
“Resist the temptation to gab, look in the mirror, show off, or waste time.
Remember that most of us sleep one-third of our lives; there really isn’t all that much time. Make the most of what you have.”
Therefore, ensure you enter the gym with absolute tunnel vision and leave the chit chat and banter until you’ve completed your workout.
Recovery
Getting adequate amounts of rest and recovery is key for building muscle.
Ensure you are getting at least 7 – 9 hours of sleep each night in order to effectively recover from each training session.
Diet
When it came to nutrition, Franco Columbu strived to keep things simple yet effective, prioritising natural, whole-based foods above anything else:
“I always try to eat fresh natural foods, as close as possible to the diet which I had in Sardinia. Whatever your diet, you should keep it simple and as natural as you can. And to complement your bodybuilding more fully, you should try to eat three or four small meals instead of one or two large ones.
Let your appetite dictate your eating times, and don’t force yourself to eat. Your training should help your appetite along, even if you’ve never been a great eater.’
Below is what Franco Columbu typically ate throughout the day.
Breakfast
1 fresh fruit in season/a large glass of freshly squeezed orange juice
Small dish of homemade plain yogurt (made with raw milk) with granola cereal
A glass of mineral water taken with vitamins and minerals
Lunch
Large fresh vegetable salad with a small amount of oil and vinegar dressing
1 cooked fresh vegetable (never frozen or canned)
1 large portion of fresh broiled protein (such as fish, chicken, steak, lamb or liver)
Small glass of wine or a large glass of mineral water
Mid-afternoon snack
1 plate of selected imported cheeses with fresh fruit in season (usually pears)
Dinner
Late evening snack
Small dish of fresh yogurt (often homemade)
Throughout the day, Columbu would always aim to drink at least 8 to 10 glasses of mineral or bottled water.
He also didn’t believe in taking protein powder so much due to their usually high carbohydrate and sugar content, believing that such supplements weren’t easily digested and assimilated by the body effectively.
Thoughts
Intermediate Workout
After performing Arnold Schwarzenegger’s home workout to get me through the pandemic for a number of months, I decided to give Franco Columbu’s intermediate workout a crack when gyms slowly opened back up again to get me used to the feeling of lifting iron plates.
In particular,
The high reps were a great way of building up muscular endurance so that I could slowly start incorporating more loads and begin enhancing my physique.
Overall,
That’s where I felt the real benefit of this routine ended.
Whilst I did experience some muscle growth: especially on my chest and legs – I didn’t make tremendous gains as my overall muscle memory was still there to call upon.
Although this routine does have its merits (especially for those who are at an intermediate level), it does not benefit the serious lifter outside the realm of sports.
Advanced Workout
After performing the intermediate workout for a number of weeks, I transitioned over to the advanced workout and that’s where the gains were far more noticeable and pronounced.
In particular,
My chest, shoulders and arms all grew very significantly due to the sheer amount of exercise variations and volume formed as part of this plan on Tuesdays, Thursdays and Saturdays.
Additionally,
On days where I’d be training back and legs, performing three variations of squats with progressive overload after already performing a total of 6 sets split between leg extensions and leg curls proved to be quite brutal.
My legs were simply not used to this level of volume and often times, I wouldn’t recover in time for the following session to target these muscle groups again.
Perhaps this is where the use of anabolic steroids would’ve given Columbu the edge in the gym as I knew it wasn’t anything to do with a lapse in my approach outside of the gym as I made sure that my nutrition and rest were consistently on point.
Nevertheless,
I grew a keen fondness of performing ‘end’ barbell rows.
The greater range of motion sublimely targeted my upper and mid-back like no other exercise had done before, thus, the back development that came from performing this exercise in particular was pretty spectacular.
Not wanting to be that ‘guy’ at the gym, I would opt for standing on a small elevated block as opposed to a bench whilst performing this exercise, and I would highly recommend you to do the same.
All-in all,
The advanced workout routine does exactly what it says on the tin.
A perfect balance of developing size, symmetery and strength without all of the fluff in between (quite literally).
This routine will require some discipline and consistency on your part though, as training 6 days a week at a high intensity level requires you not to miss a beat.
So be prepared to have your work cut out.
Closing Off
There you have it.
A complete review of two routines from one of the greatest bodybuilders to ever live.
If you’re thinking of giving these workouts a go, or have any comments or questions about anything raised in this article, we’d love to hear from you.
Let us know what you think in the comments section below!
Joseph is the Founder and Editor in Chief of CheckMeowt. When he is not sat at the computer guzzling down the nearest thing with protein in it, he can be found pulling up the world in the gym. Occasionally, he is best described as socially unreliable and easily distracte.
Pregnant? Try These 3 Pregnancy Safe Exercises for All Trimesters
Welcome, pregnant moms! As you embark on the beautiful journey of pregnancy, it’s important to prioritize your fitness and well-being. Staying active throughout your pregnancy offers endless benefits, like increased strength, minimized aches and pains, and improved preparation for childbirth and postpartum recovery. In this blog post, we’ll explore three safe and effective exercises that you can practice at any stage of pregnancy. Remember to always listen to your body and modify exercises (especially in that third trimester!) as needed to ensure a comfortable and enjoyable fitness routine. These three pregnancy-safe exercises are just a small peek into all the moves I teach in the KnockedUp Fitness Membership. Not only will you get a day-by-day workout schedule, but I’ll also walk you through how to safely and comfortably adjust each movement to your comfort level. You can learn more about the membership RIGHT HERE.
Pregnancy Safe Exercises
Exercise 1: Full Body Rotation
During pregnancy, the front of our hip flexors tends to tighten due to postural shifts. The full-body rotation exercise helps create space and relieve pressure in the hips. Here’s how to perform it:
1. Stand with your left leg slightly forward and lift your left heel, lengthening your body upwards. 2. Rotate your torso to the left, allowing your pelvis to follow the movement. Engage your core lightly, starting from the base of your pelvis and under your belly. 3. Add arm movements by reaching your left arm forward and your right arm backward. Feel the stretch and openness through your body. 4. Return to the center and repeat the rotation on the opposite side, lifting your right leg and rotating your torso to the right. 5. Perform the exercise slowly and with control, focusing on maintaining a light core connection and feeling taller with each rotation.
Exercise 2: Squats
Squats are an excellent exercise for building lower body strength and maintaining mobility during pregnancy. They also complement the full-body rotation exercise. Follow these steps to perform squats safely:
1. Stand with your feet shoulder-width apart or slightly wider. Maintain a light core connection. 2. Lower your body down into a squat position, ensuring your knees track over your toes and your spine stays upright. 3. Engage your quads, hamstrings, and glutes as you rise back up. 4. To add variation, incorporate squat pulses by finding a comfortable range of motion and performing small, controlled movements up and down. 5. Keep the focus on maintaining a light core connection and engaging the muscles in your legs and pelvic floor.
Exercise 3: Spinal Articulation with an Exercise Ball
Maintaining spinal mobility during pregnancy is essential for preventing back pain. Using an exercise ball, you can perform spinal articulation exercises to keep your spine supple and strong. Here’s how:
1. Kneel on a mat or cushion, ensuring your knees are comfortable and protected. 2. Begin by tucking your chin and slowly rounding your spine, vertebra by vertebra, until your hands are resting on the exercise ball. 3. Press into the ball, opening your chest and maintaining a light connection with your pelvic floor. 4. Activate your mid-back muscles as you slowly articulate your spine back up, focusing on control and maintaining an open chest. 5. Perform the exercise slowly, allowing your spine to move through its full range of motion while engaging your core and supporting your lower back.
See These Pregnancy Safe Moves in Action
If you’re more of a visual learner, you can follow along on the video where I demonstrate each move!
Staying fit during pregnancy is crucial for your overall well-being and preparing your body for the journey ahead. Incorporating safe and effective exercises into your routine can help you feel stronger, minimize discomfort, and support your postpartum recovery. Remember to listen to your body, make modifications as needed, and consult with your healthcare provider before starting any exercise program.
If you’re looking for more personalized guidance and support throughout your pregnancy fitness journey, try out our Knocked-Up Fitness Membership. Our prenatal membership offers group coaching, personalized help, trimester-by-trimester workouts, and answers to your questions, from preparing for pregnancy to postpartum recovery. You can learn more and sign up RIGHT HERE.
There is no denying the fact that physical health is a timeless charm. It is the one thing that can never be taken away from you and it always comes back to you. No matter how old you are, how sick you are, or how weak you are, your physical health will always be there for you. It is the one thing that will never change. it will help us learn good physical health, fitness and good eating habits are core of stress free life.
Irresistible Need
No one can deny the importance of physical health. It is the foundation of a sound mind and body, and it is essential for overall well-being. Good physical health is a valuable asset that will serve you well throughout your life.
There are many ways to maintain good physical health, and it is important to find an approach that works for you. Regular exercise is one of the best ways to maintain good physical health, and there are many different types of exercise that you can choose from. Eating a healthy diet is also important, and you should make sure to include plenty of fruits, vegetables, and whole grains in your diet. Avoiding tobacco and excessive alcohol use is also important for maintaining good physical health.
Good physical health is essential for overall well-being, and it is important to find an approach that works for you. Regular exercise, eating a healthy diet, and avoiding tobacco and excessive alcohol use are all important for maintaining good physical health.
Domestic Repercussions of Physical Health and Fitness
The benefits of physical health and fitness are far-reaching and extend beyond simply looking and feeling good. Regular exercise has been shown to reduce the risk of chronic diseases such as heart disease, stroke, type 2 diabetes, and some forms of cancer. It can also help to reduce the symptoms of anxiety and depression, and can improve mental health and well-being.
Physical activity can also help to reduce the risk of falls and fractures in older adults, and can help to improve balance and coordination. Regular exercise can also help to reduce the risk of developing osteoporosis.
Good physical health and fitness can also have a positive impact on your social life and relationships. Being physically active can help you to meet new people and make new friends, and can also help to improve your existing relationships.
Diet, Physical Health and Fitness
A healthy diet is an important part of maintaining good physical health and fitness. Eating a variety of healthy foods helps to ensure that your body gets the nutrients it needs to function properly.
including plenty of fruits, vegetables, and whole grains in your diet. Avoiding tobacco and excessive alcohol use is also important for maintaining good physical health.
Workout, Physical Health and Fitness
Exercise is an important part of maintaining good physical health and fitness. There are many different types of exercise that you can choose from, and it is important to find an activity that you enjoy and that fits into your lifestyle.
Regular exercise has many benefits, including reducing the risk of chronic diseases such as heart disease, stroke, and type 2 diabetes. It can also help to reduce the symptoms of anxiety and depression, and can improve mental health and well-being.
Ultimate Happiness
Physical health and fitness are important for many reasons. Good physical health can help to reduce the risk of developing chronic diseases such as heart disease, stroke, and type 2 diabetes. It can also help to reduce the symptoms of anxiety and depression, and can improve mental health and well-being.
Conclusion
Physical health is a valuable asset that will serve you well throughout your life. There are many different ways to maintain good physical health, and it is important to find an approach that works for you. Regular exercise, eating a healthy diet, and avoiding tobacco and excessive alcohol use are all important for maintaining good physical health.
Unique Fitnessoffers 3 locations here on Long Island, each with their own style and focus, attracting people of all different ages, fitness levels, and abilities. Contact us today to claim your free 3-day trial membership.
Staying fit while traveling or when you are away from a gym can feel impossible. With so many fitness apps available, it can be overwhelming to pick one that fits your needs, especially when you are on the go or working with limited equipment.
That’s where Freeletics stands out – whether you are in a hotel room or outdoors with no equipment, Freeletics can keep you on track with highly customizable workouts tailored to your surroundings. In this guide, we will show you how to make the most of it, no matter where you are.
Its flexibility makes it ideal for travelers or those without access to a gym.
While our full Freeletics Fitness app review covers its features, pricing, and overall performance, this guide focuses on how to use Freeletics effectively in various environments and get the most out of it, even when equipment is limited.
Let’s discuss.
Why Freeletics is Ideal for Hotel or Hotel Room Workouts
Freeletics is well-known for its versatility, particularly in environments where equipment is limited. Whether you are staying in a hotel, traveling, or enjoying the outdoors, Freeletics offers highly customizable workouts that suit your situation.
With its focus on bodyweight exercises and personalized training programs, you do not need to worry about finding a gym to stay on track with your fitness goals.
Let’s dive into some practical tips and strategies for getting the most out of Freeletics when you are on the go.
Step-by-Step Guide: Setting Up Freeletics for Hotel Room Workouts
Hotel rooms may not offer much space, but Freeletics tailors its workouts so that you can exercise efficiently in small spaces. Here is how to make the most of the app in a hotel room:
Download and Set Up the App
Install Freeletics from your app store.
Go through the initial setup questionnaire, providing information like fitness goals, preferred workout style, and available equipment (or lack thereof).
Choose Bodyweight Training
For hotel rooms, select bodyweight-only workouts in the app. Freeletics offers several bodyweight-based routines perfect for tight spaces.
Pay attention to how the app adjusts workout intensity after each session and tweak your training preferences if needed to ensure continuous progress.
Select Short and Intense Sessions
Time is often limited when traveling, so maximize efficiency by choosing 15-20 minute high-intensity workouts. Freeletics has pre-configured sessions, so you can quickly jump into action.
Try workouts like “Gods Workouts” or “Aphrodite”, which are designed to push your limits without requiring any equipment.
Focus on Mobility and Bodyweight Strength
Every workout includes a guided warm-up and cool-down routine, which is essential for avoiding injury, especially when you’re working out in unfamiliar places.
Outdoor Workouts with Freeletics: Maximize Your Environment
Training outdoors adds an extra layer of freshness and energy to your workout. Freeletics adapts well to outdoor environments, helping you build strength and endurance using just your bodyweight or minimal equipment like a park bench.
Utilize Your Surroundings
Outdoor areas like parks or open fields are perfect for dynamic workouts. Use benches for triceps dips or step-ups, and find a sturdy branch for pull-ups. Freeletics lets you maximize these settings for a well-rounded workout without needing gym equipment.
Exercises like triceps dips, box jumps, or incline push-ups can be done on park benches.
Explore Freeletics’ Running Integration
Freeletics integrates running workouts into its training plans. If you are in a place where running is an option, you can choose interval-based running sessions or cardio-based workouts.
Combine bodyweight workouts with short sprint intervals to boost fat burning and endurance.
Leverage the App’s Progression Features
Freeletics adapts your workout intensity based on your performance. If your workout feels too easy, the app will gradually increase the difficulty.
Use the progression tools to challenge yourself incrementally, especially when you are traveling. For example, track how your running pace improves across different terrains or try to increase your reps each day during your hotel room workouts.
Adapt to Weather Conditions
Outdoor workouts come with unpredictability, especially due to weather. Freeletics offers flexibility – if rain or cold weather keeps you from running outdoors, you can opt for a bodyweight-only session and complete it indoors, or focus on mobility and recovery routines.
Tips for Traveling with Freeletics
Traveling often disrupts workout routines, but with Freeletics, you can stay on track by customizing your workouts based on available equipment and space.
To help you get the most out of the app, here are a few quick travel hacks to maximize your Freeletics experience while you’re on the move:
Save Workouts in Advance: Since Freeletics requires an internet connection, plan your workout when you have access to Wi-Fi. Save the workout details so you’re ready even if the connection drops.
Use Hotel Furniture: Get creative with what’s around you! Use the edge of a bed for incline push-ups or a sturdy chair for tricep dips. No space is too small with the right mindset.
Power Up in 15 Minutes: Short on time? Try a Freeletics workout like ‘Aphrodite’—a high-intensity bodyweight routine that works your entire body in less than 20 minutes. Perfect for a quick burn between meetings or flights.
Warm-Up Without Leaving the Room: Even if your space is limited, Freeletics’ built-in mobility exercises and warm-up sequences make it easy to get started right in your hotel room.
These simple hacks will help you stay consistent even when you are traveling and don’t have access to a gym.
Additionally, Freeletics offers many different approaches to keep your fitness routine varied and enjoyable. Let’s have a look.
Experiment With Different Approaches
Freeletics started with bodyweight-only, which were great and gave trainees a lot to work with. Trainees can use countless equipment-free activities to work all the major muscle groups, build strength, and improve their endurance.
That said, Freeletics has evolved a lot since the early days, and trainees can now enjoy a variety of workout approaches.
Get the most out of the app by trying various approaches based on your available training equipment, preferences, and goals. For example, try some kettlebell workouts if you have one or two kettlebells at your disposal.
Changing your training is a great way to keep things engaging and find new ways to enjoy the fitness journey.
Do More of What Works
No fitness journey is without its ups and downs. Not all workouts, training programs, and even coaches will be a good fit for you, which is okay. Fitness is about trying different things, seeing what works, and discarding the rest. It is a journey of self-exploration, where the goal is to find what helps you reach your goals.
To that end, we encourage you to experiment with Freeletics and try different journeys and workout approaches. See what you like and what you do not. Track your progress (more on that in a moment) and do more of what already works.
Track Your Performance
The beauty of Freeletics is that it records everything you do, which means you can easily review your previous performance and set goals for your upcoming sessions.
For example, if you have lifted a 45-lb kettlebell for 12 reps before, strive to do a couple of extra reps the next time.
Aiming for small improvements allows you to provide the necessary stimulus to keep building muscle, getting stronger, and losing fat.
Watch the Instructional Videos
One thing that sets Freeletics apart from many other fitness apps is the quality of the instructional videos. It is clear that the folks behind the app have invested heavily in producing these videos.
The instructors know what they are doing and demonstrate each exercise well.
We highly recommend paying attention to the videos and absorbing as much knowledge as possible. Even if you are confident that you can do an exercise correctly, there are things you can learn to improve and maximize your workout results.
Work With a Coach
Proper training guidance can greatly help because even relatively brief workouts can provide a decent stimulus and drive progress. People who work out consistently report feeling better, having more energy, and finding everyday tasks easier to handle.
That said, working out is one part of the equation – one side of the coin if you will. You must also pay attention to your nutrition to get the best possible results, which is why we recommend leveraging the coaching option inside Freeletics.
For less than a coffee a week, you get a training and nutrition bundle, providing the guidance you need to perform at your best, recover well, and fuel yourself for success.
Final Thoughts: Use Freeletics as Your Travel Fitness Companion
No matter where you are—hotel, park, or unfamiliar location—Freeletics offers a powerful way to stay fit and challenge yourself. Its focus on bodyweight exercises, combined with the flexibility to adapt to your environment, makes it the perfect tool for fitness enthusiasts on the go.
Remember to customize your workout settings based on your location and equipment, and make use of the app’s progression tracking, video guides, and coaching for maximum results.
For more in-depth details about the app, check out our comprehensive Freeletics App Review for a full breakdown of its features, pricing, and usability.
Frequently Asked Questions
Still have questions about using Freeletics while on the go? Here are some of the most common concerns travelers have about using the app.
Can I use Freeletics without any equipment?
Yes! Freeletics is primarily designed for bodyweight exercises, making it an excellent option for hotel rooms, outdoor areas, or any place where you have limited or no access to equipment.
How do I stay consistent while traveling with Freeletics?
The key to consistency is leveraging Freeletics’ flexibility. You can adjust your workouts based on available time, space, and equipment. The app’s ability to tailor workouts based on your feedback also helps keep things manageable and sustainable.
Does Freeletics work offline?
Unfortunately, Freeletics requires an internet connection to load and update workouts. Be sure to connect to Wi-Fi or use mobile data when necessary. If you are traveling, consider using an eSIM to stay online. Saily, from the makers of Nord VPN, offers fair and simple data volume in almost every country. Get a 5% discount when using “SPECIAL5” with our link.
10 Dec Seed Oils, Cholesterol, and Heart Health – The Lies We Have Believed with Dr. Cate Shanahan
Are Seed Oils Really Wrecking Your Health?
What if the oils you’ve been told are “heart-healthy” are actually sabotaging your health? Dr. Cate Shanahan has been shouting this from the rooftops long before seed oils became a hot topic.
But could these oils be the hidden reason behind premature aging, fine lines, and wrinkles? What kind of damage are they doing to your body at a cellular level? And why are they still lurking in so many “healthy” foods?
We’re digging into the shocking history behind seed oils, the damage they can do to your body at a cellular level, and why they might be the hidden culprit behind those constant food cravings.
Curious how to cut them out—and if it’s even possible in today’s world? Plus, there’s a surprising twist about cholesterol and heart health that could flip everything you thought you knew.
Like many of us in midlife, growing up, Dr. Cate heard that saturated fats were the “bad” fats for us. This fad (and misinformation) led us all to reach for the “heart healthy” vegetable oils without saturated fats. Come to find out, these alternatives were/are actually NOT healthy for us. Polyunsaturated fats, the “heart healthy” vegetable oils, behave in a way that makes them very dangerous to our cellular health and every bodily function we have. Seed oils make our midlife health and experience way more miserable than nature ever intended it to be.
Why Did Seed Oils Become So Popular?
The reason Ancel Keys was so influential is that in the 1940s and 1950s there was a new health problem that hadn’t existed prior: men were dying of heart attacks. This at the time was a new phenomenon and no one understood what was happening. Ancel Keys was in the headlines for making a “connection” (though it was very vague) between fat and heart attacks. In 1948, Proctor and Gamble (a company selling vegetable oils at the time) donated 1.75 MILLION dollars (1948 dollars mind you) to an organization called the American Heart Association.
At the time, this organization was on a mission to find the cause of the heart attacks. Unfortunately, Ancel Keys was able to persuade them into conforming to his personal narrative. By the time the 1960s rolled around, the broad idea of “fat” had evolved to “saturated fat” being the bad guy and suddenly butter was bad. This led the industry to boom in marketing toward “heart health”. We have been bombarded with ultimate gaslighting on seed oil. The modern day truth is, seed oils are actually what are causing a lot of the heart attacks and other cardiovascular events.
The Hateful 8 Seed Oils and Where Seed Oils Come From
The average American gets 80% of their fat calories from a combination of these eight seed oils that are catastrophic to our health:
Corn
Canola
Cottonseed
Soy
Sunflower
Safflower
Rice Bran
Grapseed
Seed oils come from massive, complicated processes that take place in factories of mass scale, from seeds that were never bred to be FOOD. The extraction (even organic, expeller pressed) and the refining of these crude seed oils cause many problems in our bodies by generating toxicities and removing important nutrients, ultimately leaving polyunsaturated fatty acids vulnerable to oxidation SO BAD that eating ONE french fry is equal to smoking an entire cigarette in terms of toxicity.
Seed Oils and Skin Cancer Connection
This has to do with the real cause of cancer: cancer comes from mitochondrial damage. The fact of the matter is, UV light can damage your mitochondria. Fortunately though, our skin is designed to “tan”, where we produce melanin, to trap UV light and protect our mitochondria. In a perfect world, almost all of us (few exceptions) would be able to tan when exposed to UV light. What happens is that when we consume seed oils, the sun ignites reactions in our fat under our skin. These reactions are the “burning” that we see in the sun, and when this is happening and we are not tanning, we ARE exposing ourself to the mitochondrial damage. If you were to take away seed oils, you could probably take away most skin cancer (of course there ARE other ways to damage mitochondria, but Seed Oils are the most common).
Do Seed Oils Cause Weight Gain?
Yes. Dr. Cate’s hypothesis based on her studies shows that the connection between seed oils and weight gain has to do with how our cells produce energy. Our cells produce energy in mitochondria and when our mitochondria have to fight off the toxins and polyunsaturated fatty acids, our mitochondrial health is destroyed, and immediately stop producing energy.
The only way to get more energy at this point in the cycle, is to use the sugar from your blood, which then causes a drop in blood sugar, and causes you to feel hungry (or HANGRY). Seed oils actually create uncontrollable hunger, and therefore, overeating and snacking every few hours (aka insulin resistance).
Cutting Our Seed Oils to Heal Your Body
Seed oils are THE worst thing that has happened to our food supply since the beginning of time – ever! Consuming seed oils will inevitably create disease in our bodies. Dr. Cate has found that all of our chronic disease epidemics (heart attacks, strokes, diabetes, strokes, kidney problems, hypertension, inflammatory diseases, thyroid diseases, mental illness, hormonal imbalance, gut issues, etc.) stem from consuming seed oils.
Once Dr. Cate started diving deep into studying how seed oils destroy our cellular health and started realizing how they destroy any capacity for any normal cellular, hormone, organ, brain, etc. functions, she realized it was one of the BIGGEST root causes of so many of our illnesses.
After trying it on herself with recovery success, Dr. Cate began implementing her healing practices on patients who had otherwise incurable issues like fatty liver, inflammatory skin conditions, elevated triglycerides, etc. By avoiding these seed oils, she began seeing major success in healing with her patients.
This and SOOO MUCH more extremely valuable information in this episode!
👉 Highly highly recommend you check out Dr. Cate’s new book ‘Dark Calories’ and visit her website HERE to sign up for her newsletter!
✅ Try ONEskin HERE and get 15% off by using the code ‘NATALIEJILL’ at check out
🎙️ Want to listen in on a LIVE recording of Midlife Conversations? You can listen in, hear the episode unedited prior to launch AND stay on and ask your questions to the guest! (Don’t worry! We won’t air your questions so you can stay anonymous!) Go to Join.Midlifeconversations.com to learn more
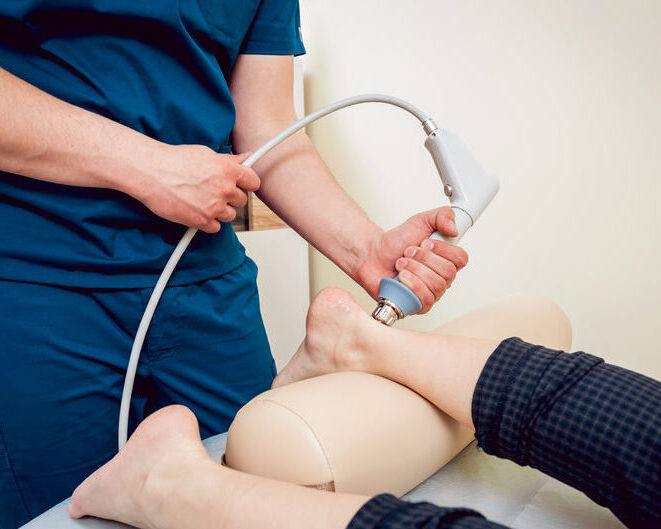


 I didn’t anticipate getting much out of Breath. I (foolishly) thought I knew what I needed to know on the topic. Listening to Nester on the